
Triangle Kinesiology Courses User Guide
Contents:
1. Log in Questions
1.1. From the School Homepage
1.2. From the Course Sales Page
1.3. Check for Multiple Accounts
2. Purchase a Course
2.1. Checkout Page
2.2. Order Summary
2.3. Add VAT ID
3. Payment Information
3.1. Student Login Details
3.2. Credit card
3.3. PayPal
3.4. Mobile (Google Pay or Apple Pay)
3.5. Billing Address
3.6. Complete Your Purchase
4. Edit or Delete Student Credit Card Information
4.1. Add or edit address information
5. Cancel or manage subscriptions
6. Understanding the Course Curriculum View
6.1. Navigating Through Lectures
6.2. Marking Your Course Progress
6.3. Adjusting Lecture Video Settings
6.4. Downloading Lecture Content
6.5. Commenting On a Lecture
7. Reset Your Password
7.1. Try an Alternative Browser or Device
7.2. Clear Your Cache
7.3. Uninstall or Disable Third-Party Browser Extensions
8. Contacting Triangle kinesiology courses
1. Log in Questions
Overview
Once you’ve enroll in a course, you’ll need to log in to Triangle kinesiology courses in order to access your course.
When you enroll in a course, you’ll receive an email confirmation that contains a link to the course. You can use this link to open your course, or you can type the school or course page URL into the address bar of your web browser.
1.1. Log in to Your Course From the School Homepage
If you don’t have the direct link to the course sales page handy, you can log in to your course via the homepage of the Triangle courses in which you are enrolled.
To log in to your course via the school homepage, complete these steps:
- Click Login in the upper right-hand corner of the homepage

- Enter the email address and password you used to register your account and click Log in.
- Once you’ve logged in, click on the My Courses tab. All of the courses that you are enrolled in will appear in this tab:
- Then, click on the course that you would like to access.
1.2. Log in to Your Course from the Course Sales Page
You can also login via the sales page of the course in which you are enrolled. Your original enrollment/purchase confirmation email will contain a link to the course sales page.
Note: If you’re logged in already, then navigating to the course sales page will automatically redirect you to the course curriculum page.
To log in via the course sales page, complete the following steps:
- Click Login in the upper right-hand corner of the sales page.
- Once you’ve logged in, click on the My Courses tab. All of the courses that you are enrolled in will appear in this tab:
- Then, click on the course that you would like to access.

1.3. Check for Multiple Accounts
Sometimes, students are not aware that they have created multiple accounts in a school, using different email addresses. If you are able to successfully log in but are unable to locate or access your course, then you may have multiple accounts in the school. Since you’ll only be able to access your course by logging into the account that was used to purchase or enroll in the course, ensure that you are logging into the correct account. If you’re unsure if you’ve created multiple accounts, contact Triangle courses.
2. Purchase a Course
This article goes over how to purchase a course as a student.
Overview
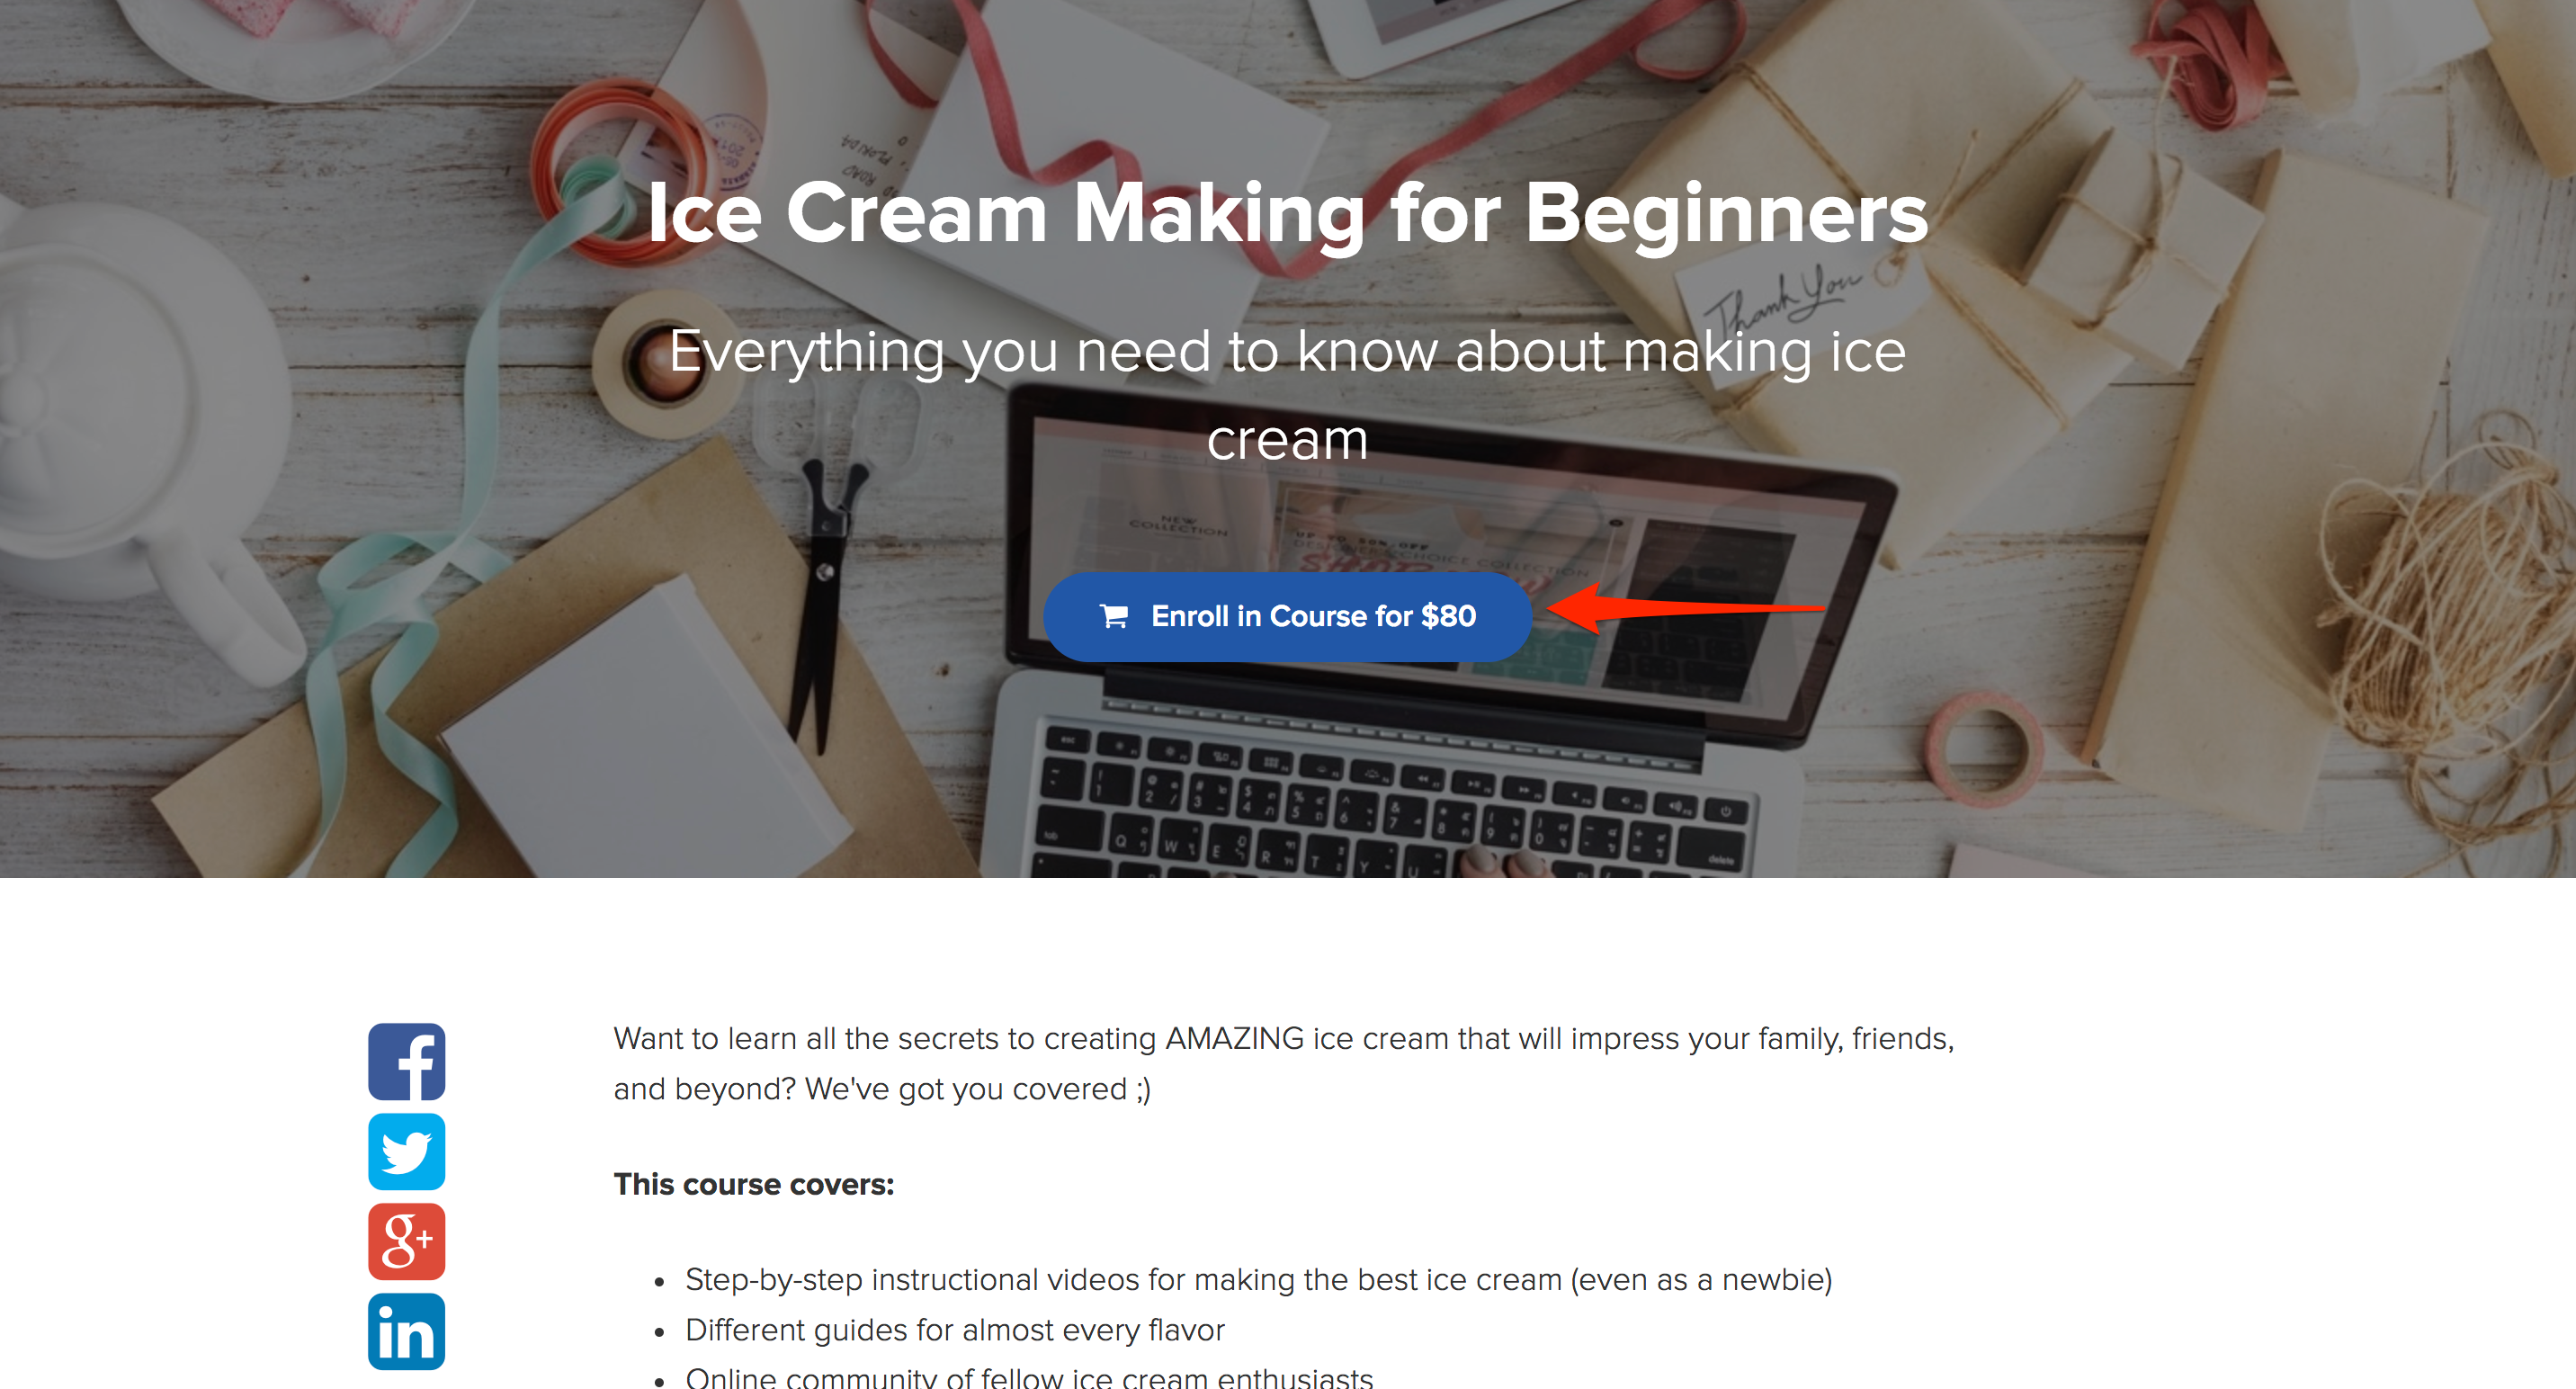
Once you decide to purchase a course from the Triangle school, you'll first have to decide which pricing plan you want to purchase. If there is only one pricing plan, then you can click any enroll button on the sales page to bring you to the checkout page.
If there are multiple pricing plans, you'll have to choose which one you'd like to purchase.

Once you select a pricing option, you can continue to the checkout page by clicking the enroll button.
2.1. Checkout Page
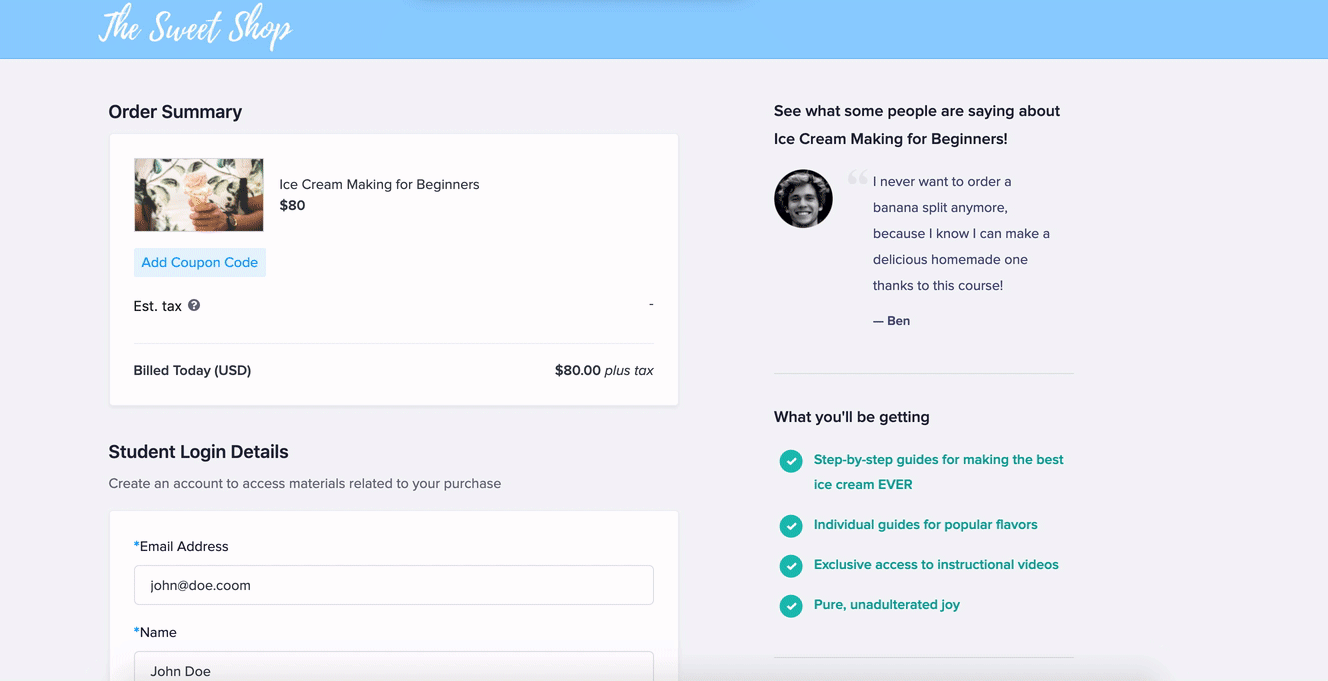
Once you're redirected to the checkout page, you’ll be able to add coupons, add a VAT ID (if applicable), as well as select which account and payment method you’d like to use to purchase the course.
2.2. Order Summary
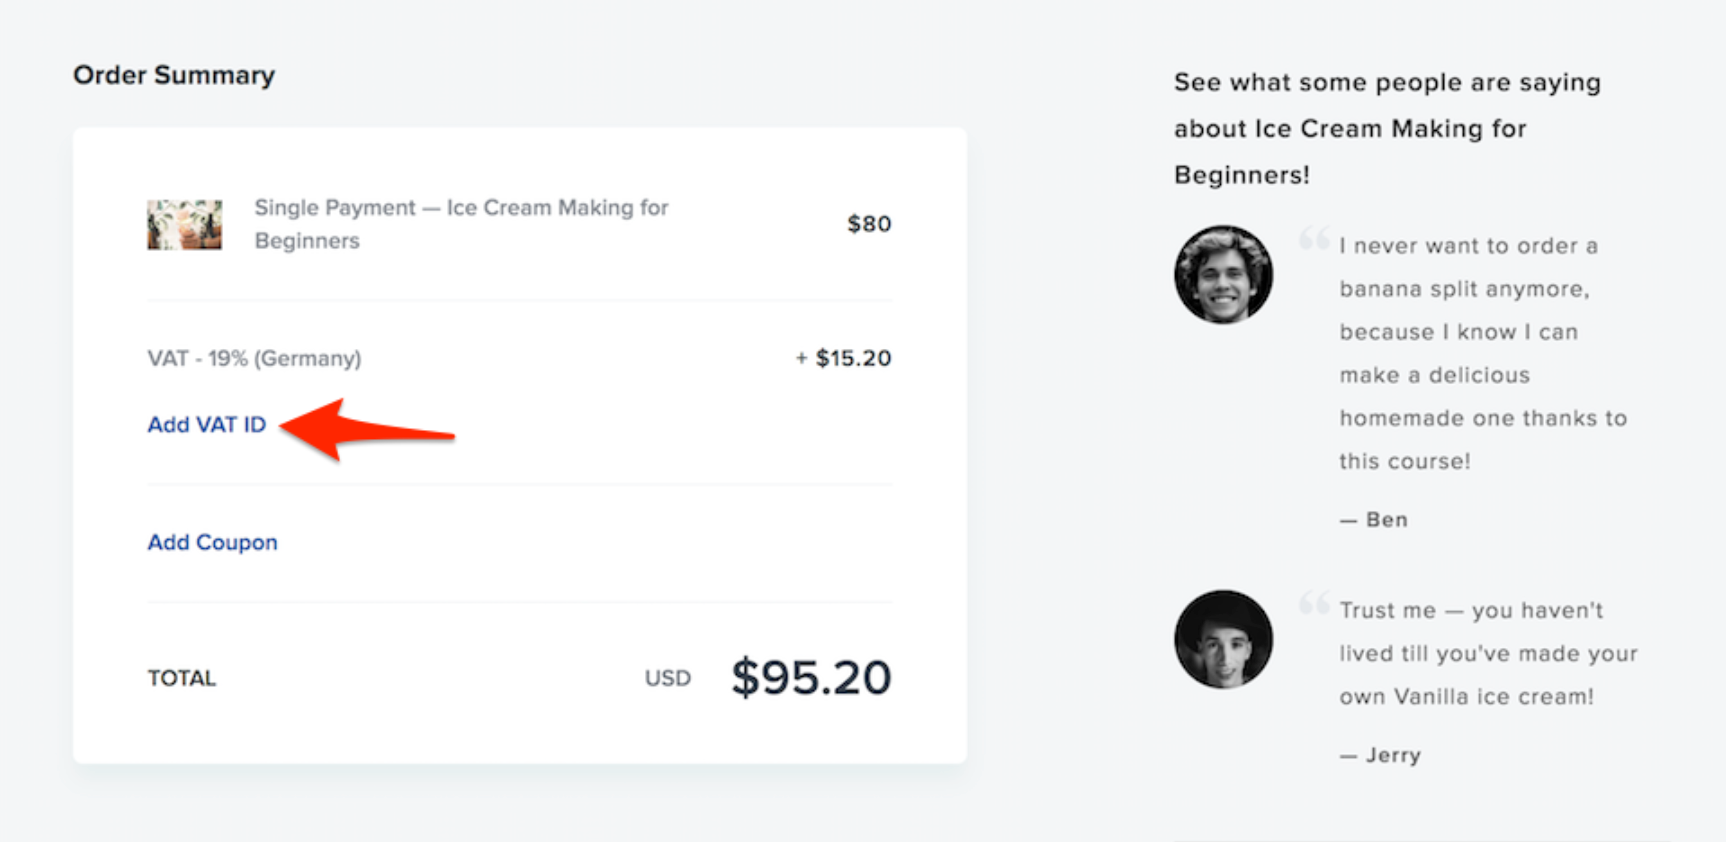
In this section of the checkout page, you can review the course you are purchasing, and the final amount. If applicable, this is also where you would enter a coupon code or VAT ID.
If you have a coupon code, clicking the Add Coupon button will reveal a text field for you to enter your coupon code. Once applied, the pricing will reflect your new discounted price.
2.3. Add VAT ID
If you are located in a country where VAT is levied, the amount charged for VAT will be shown here. If applicable, you can click Add VAT ID to input your VAT ID number, which will in turn remove the VAT charge from your order total.
3. Payment Information
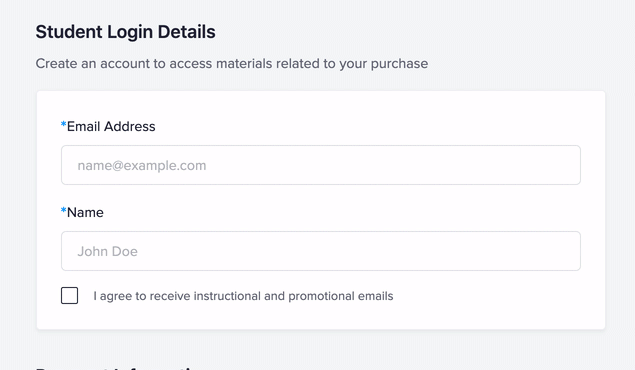
3.1. Student Login Details
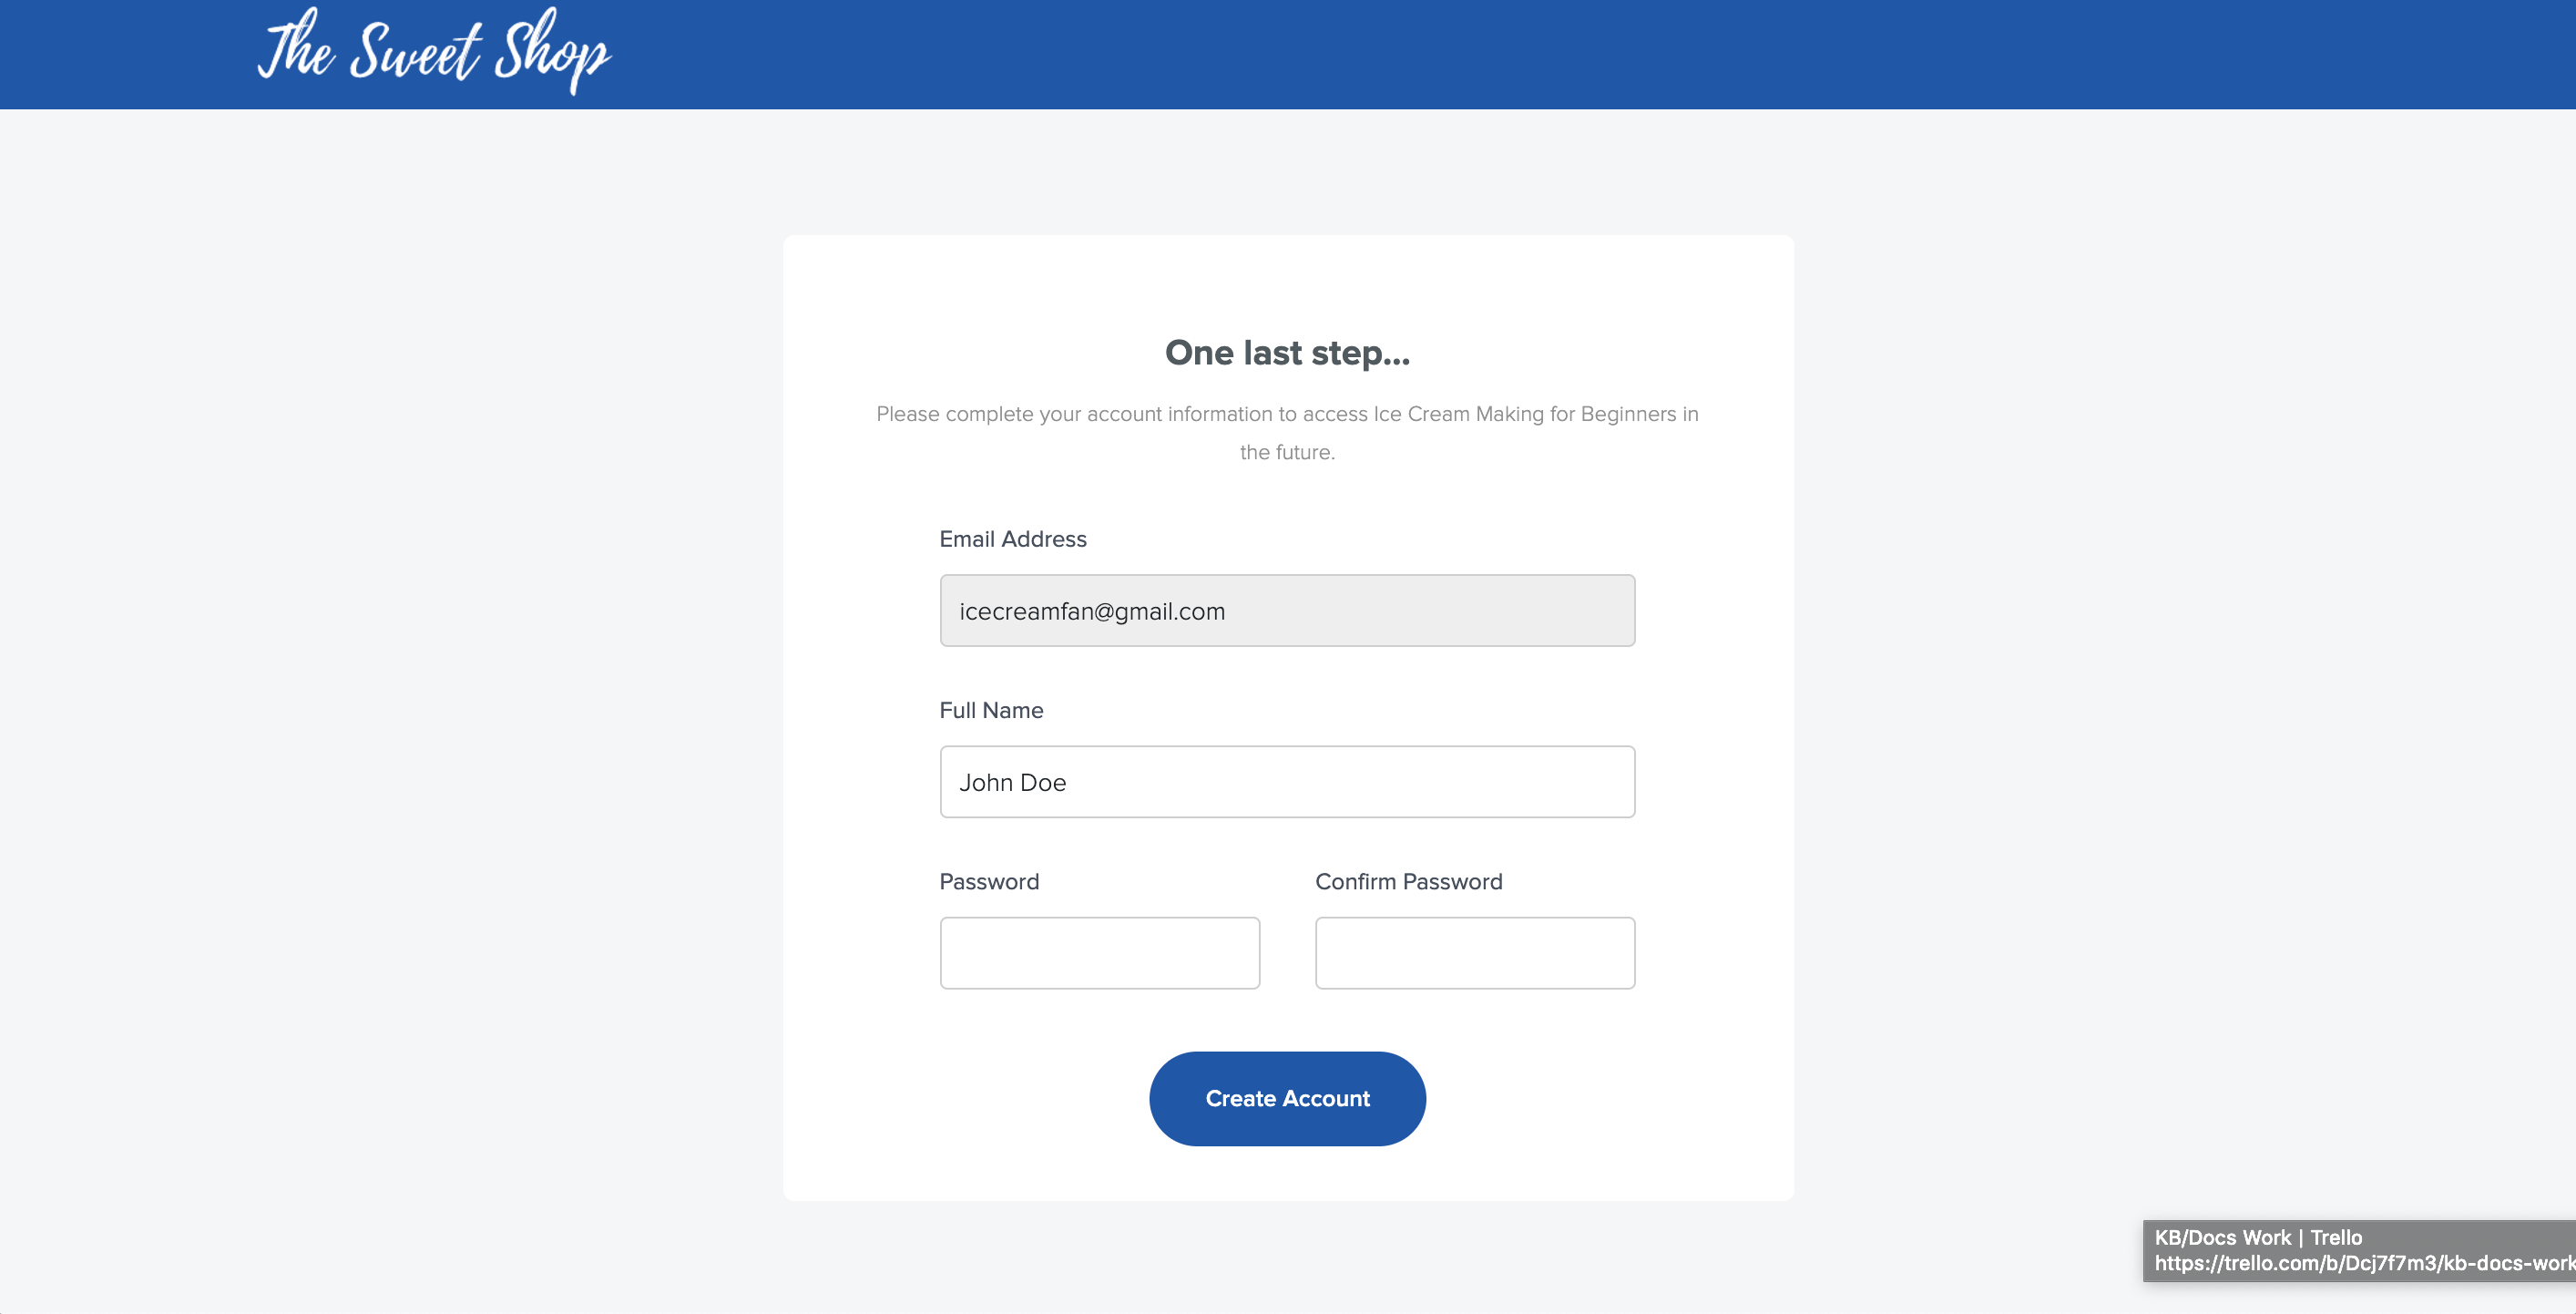
If this is your first time purchasing a course from this school, and therefore you do not have an account already, the email address you enter here will be used to create your account.
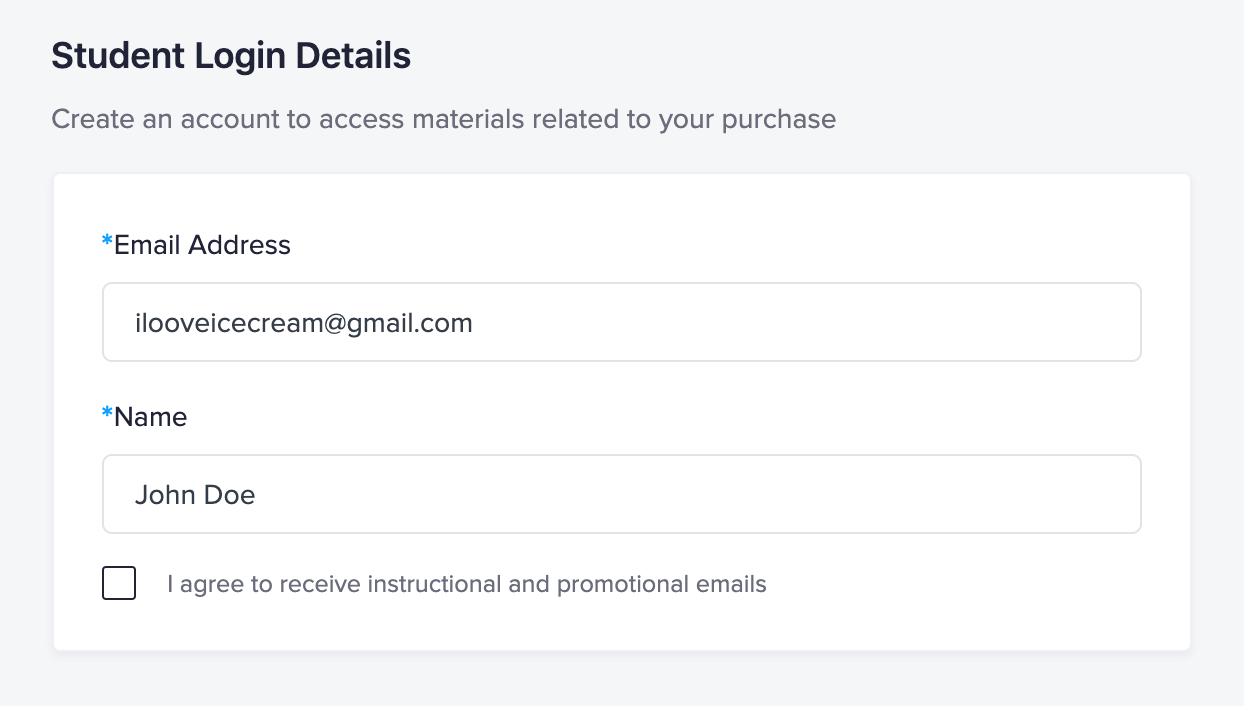
After completing your purchase, you'll be prompted to input your name and create a password for your account. You'll also be sent an email asking you to confirm their account (more on that below).
If you already have an account in the school, enter in the email your account is under. Then, you'll be prompted to enter your account password. Enter in your password and click Log In.
3.2. Payment Information - credit or debit card
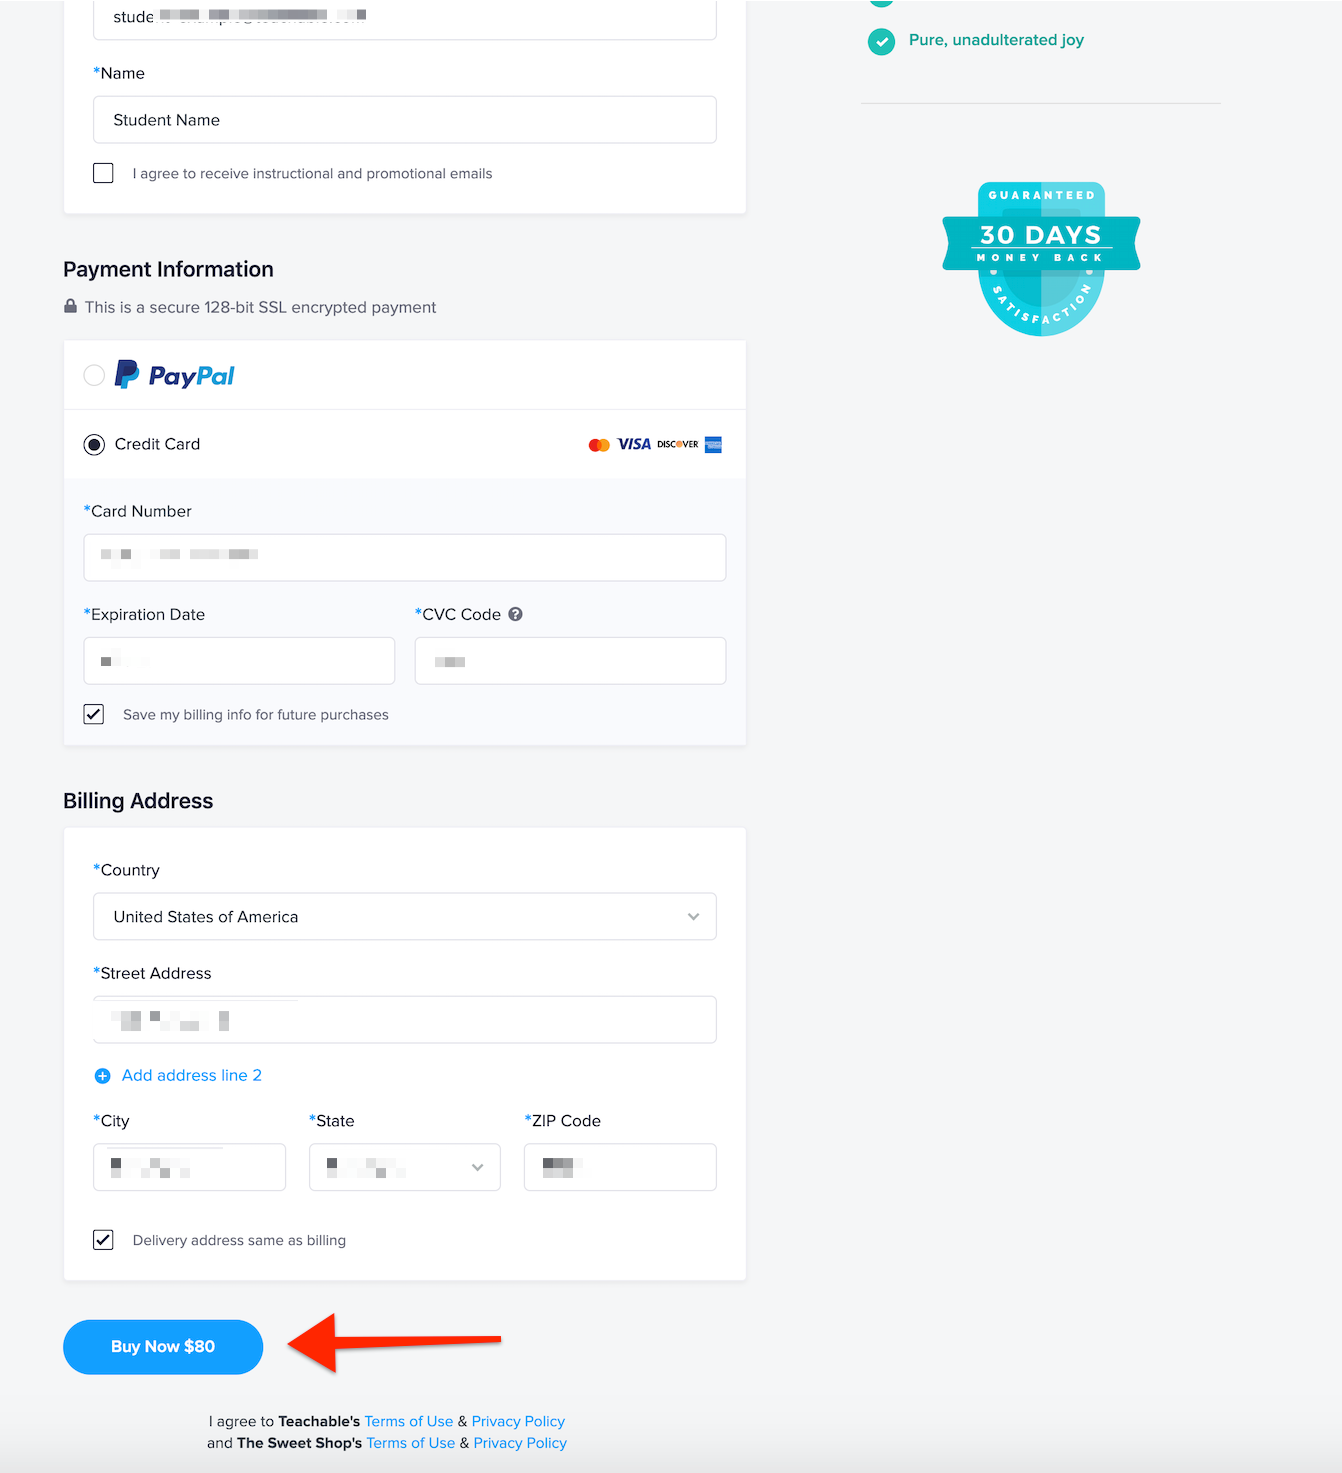
Here you can choose your payment method: PayPal, credit card, or mobile pay. If you are purchasing a course using a credit card, select the Credit Card radio button. Then enter your Name on Card, Card Number, Expiration Date, CVC Code, Country, and Postal Code. When you're finished, click the Buy Now button.
If you make any errors when entering this information, the incorrect information will turn red. You can then re-enter the information.

3.3. Payment Information - PayPal
If you are purchasing a course using PayPal, select the PayPal radio button and select your Country, then click the PayPal button. Upon checkout, you'll be redirected to PayPal’s website to complete your purchase.
Note: Courses with recurring (e.g. subscription or payment plans), non-USD pricing plans can only be purchased with a credit card.

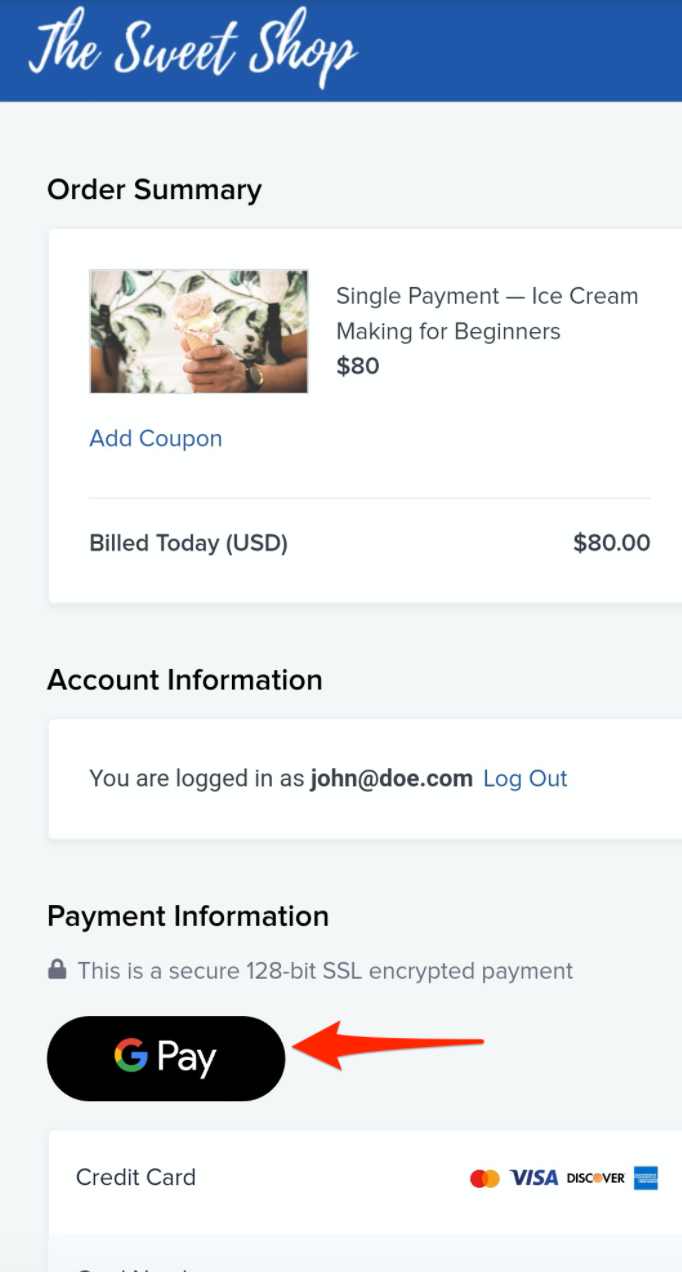
3.4. Payment Information - mobile (Google Pay or Apple Pay)
If you are purchasing a course using a mobile payment app, either Google Pay or Apple Pay will be displayed. Tapping this option will take you to a modal where you will be asked to review your payment information. Ensure everything is correct and tap Pay. You will be asked to enter your CVV number. Tap Confirm.
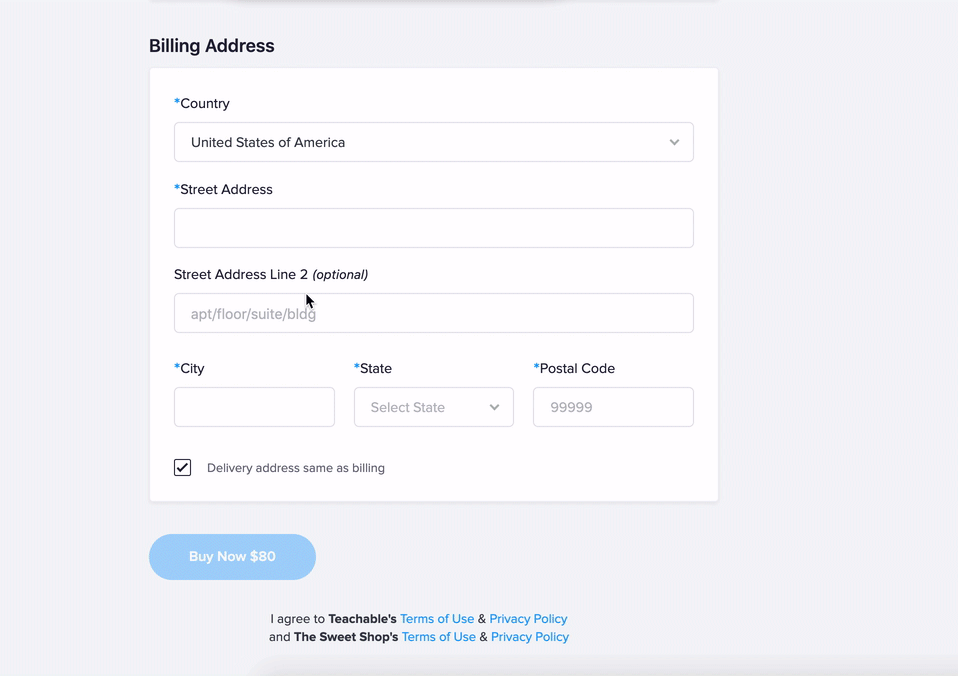
3.5. Billing Address
If you are purchasing the product with a credit or debit card, you will be asked to complete your billing address.
If purchasing the product as a business, you can click the option Add a Business Name button to enter in your business name. If a business name is added, it will be listed in the Billing Address section of the student receipt.
Users are prompted to fill out Country, Street Address, City, State/Province/Region, and Postal Code. Required fields vary by country.
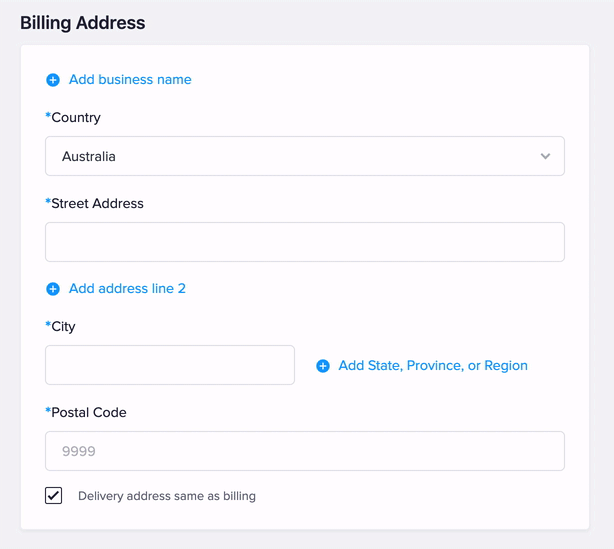
All customers have the option to check off a Delivery address same as billing field. If the delivery address is different from the billing address, customers will be prompted to fill in a delivery address as well. While there might not be any physical products associated with the purchase, this information is required to calculate any taxes, if applicable.
3.6. Complete Your Purchase
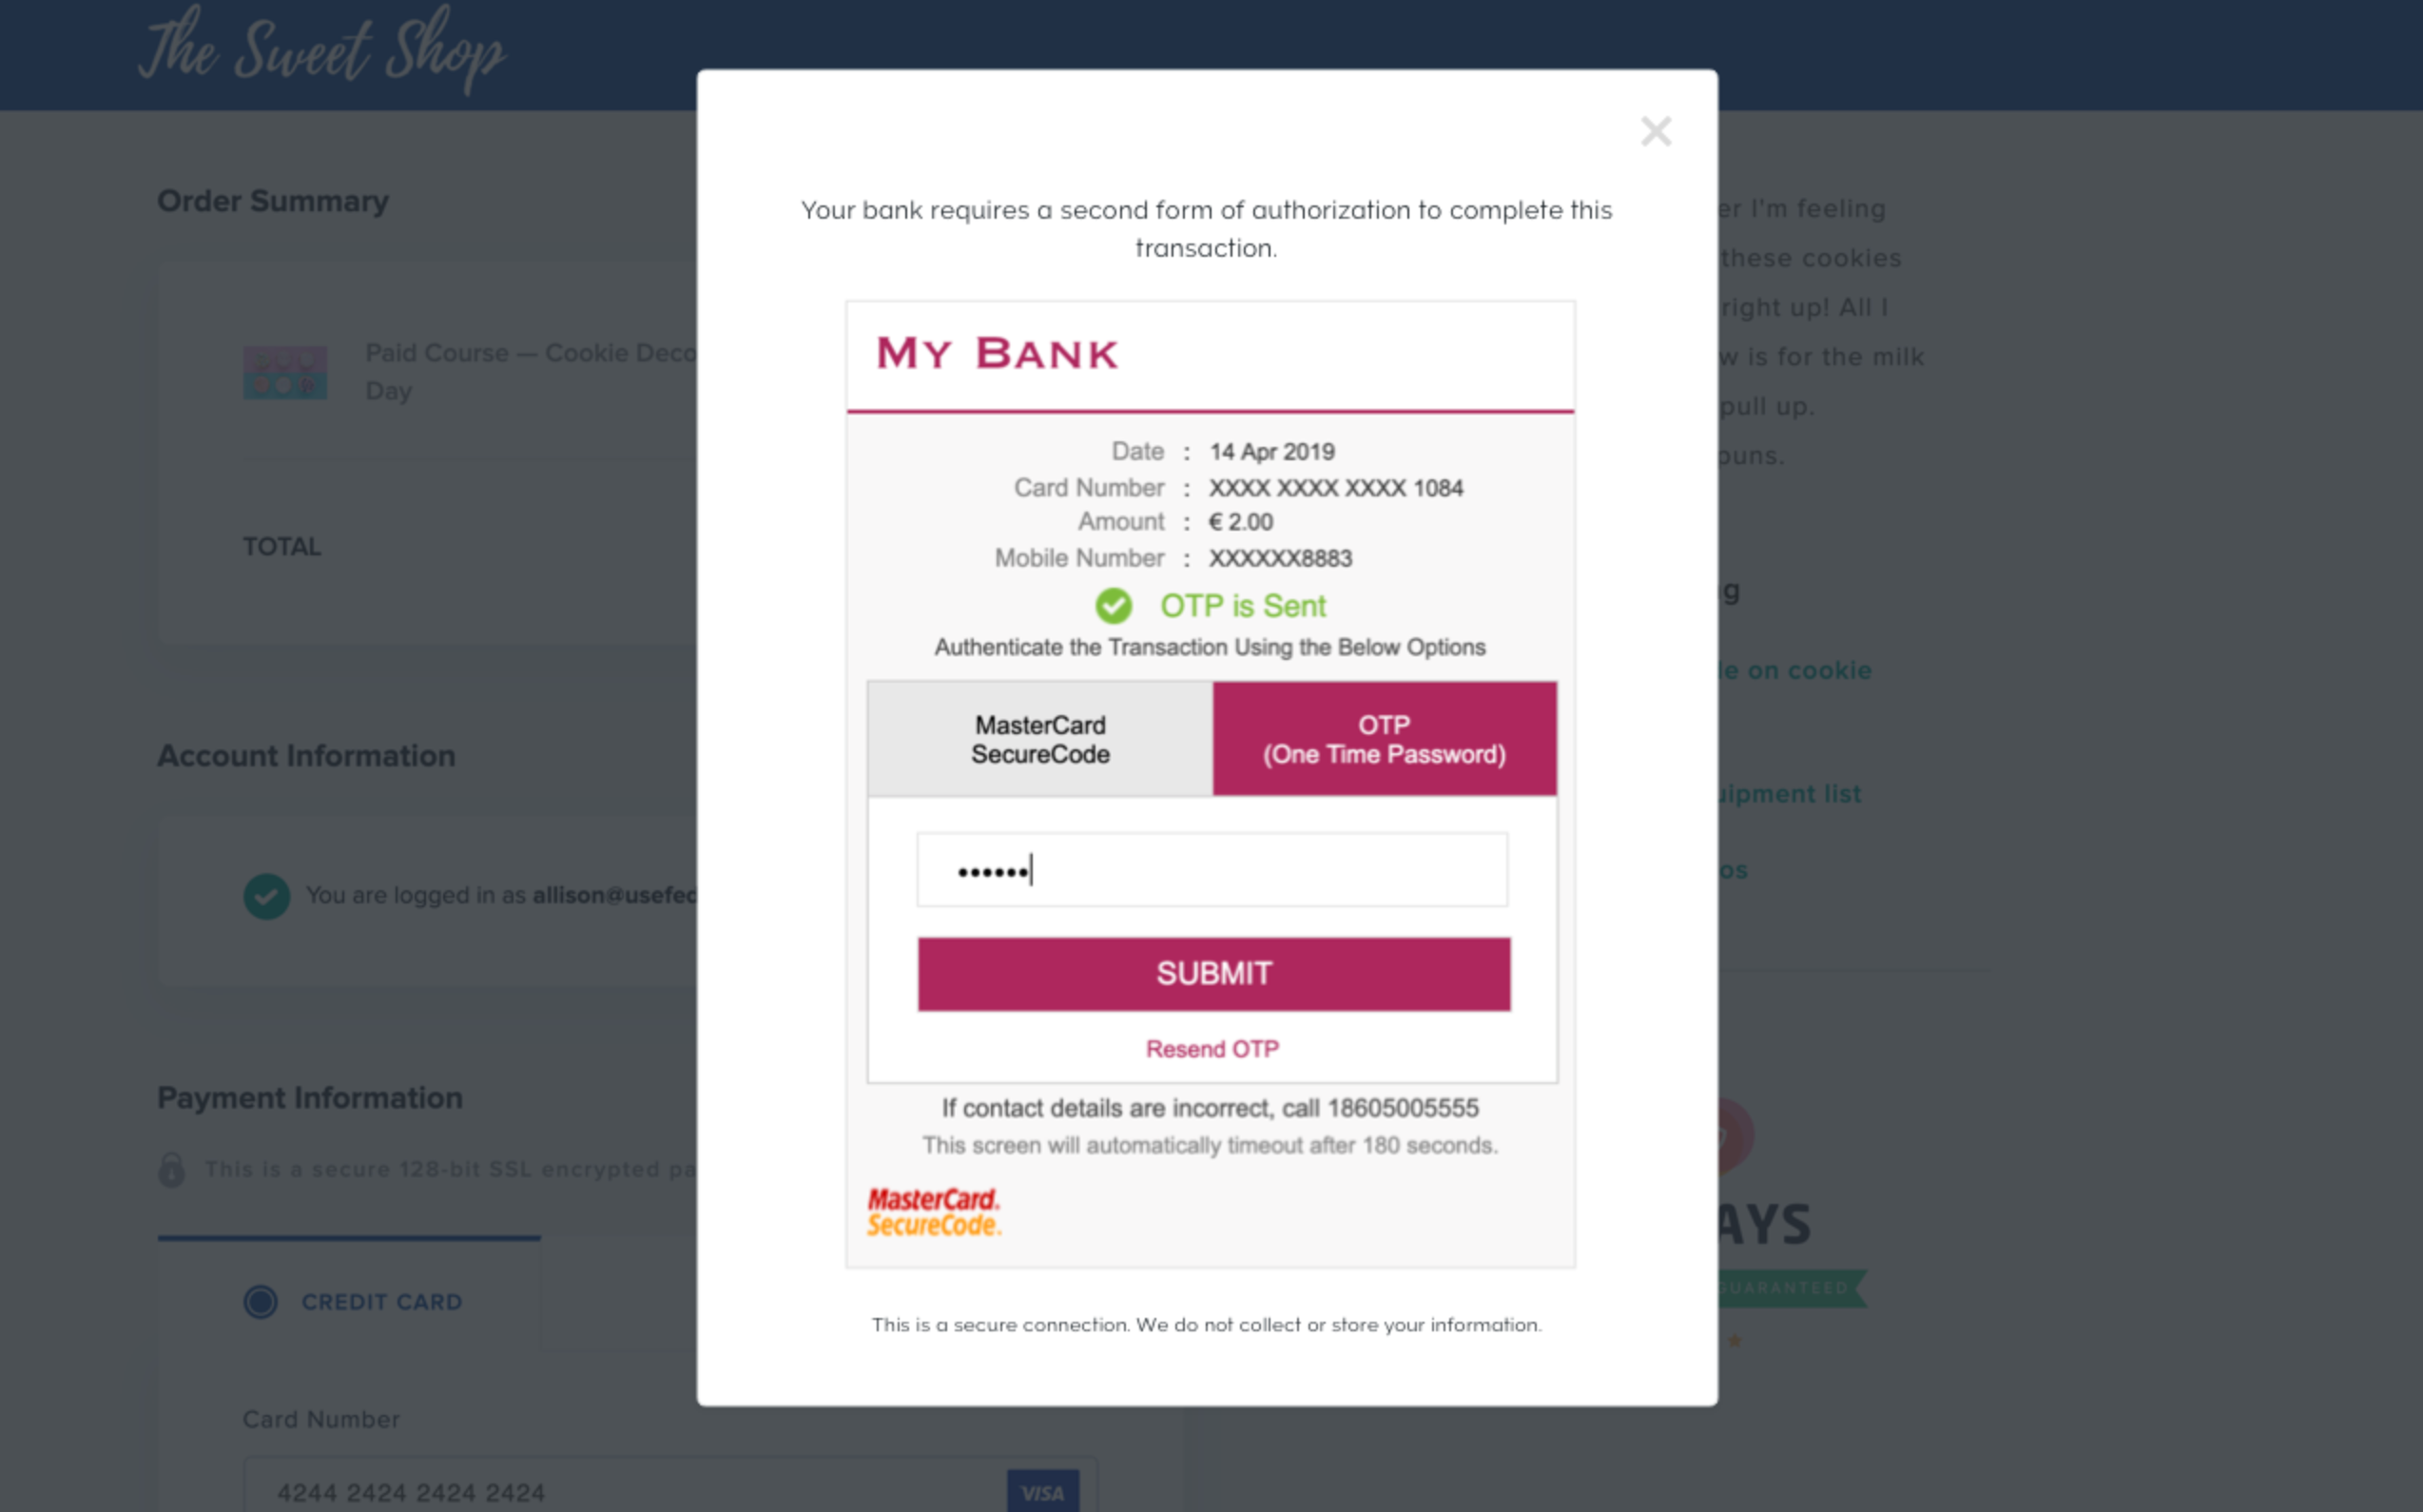
Once you have entered your payment information, click the Buy Now button to complete your purchase.
In some cases, your bank may require you to authorize your credit card payment. If so, a pop-up window will appear prompting you for additional information to authorize the payment with your bank:
Note: If you’re using PayPal to purchase a course, then you will be redirected to PayPal to complete your purchase.
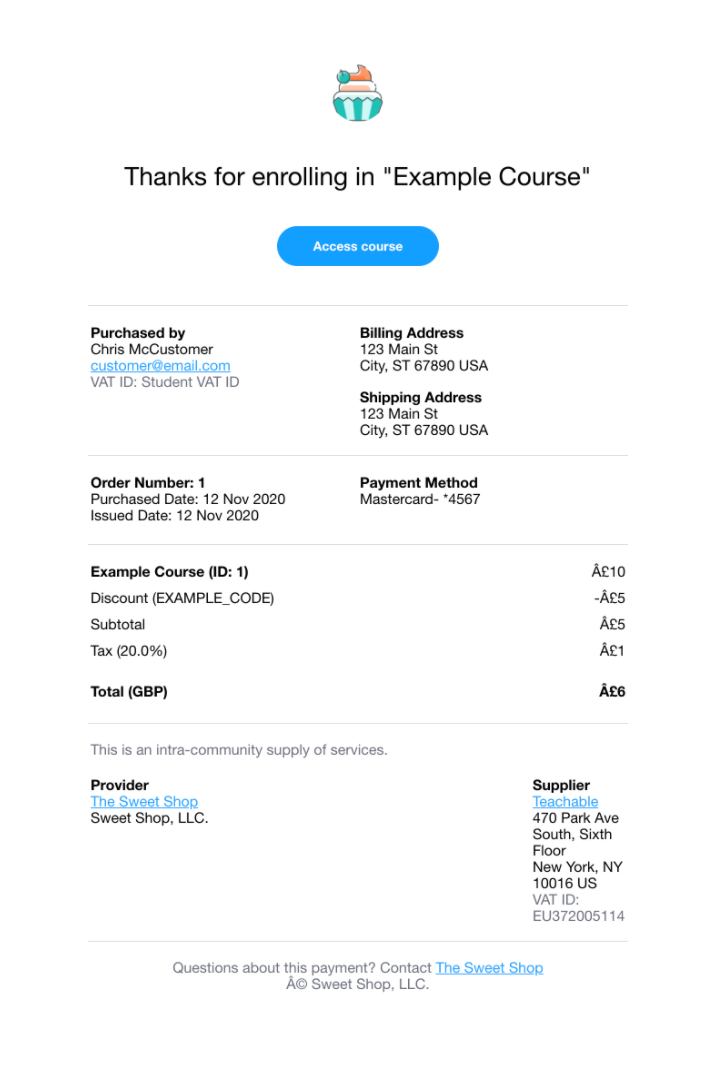
Once you complete your purchase, you’ll be directed to a thank you page and will automatically receive a receipt to the email specified in the Account Information section that provides more details about your purchase:
You'll also receive an account confirmation email. To confirm that your email address is correct, click Confirm Email.
Now, you can log in and access your new course!
4. Edit or Delete Student Credit Card Information
This article goes over how you can edit your billing information.
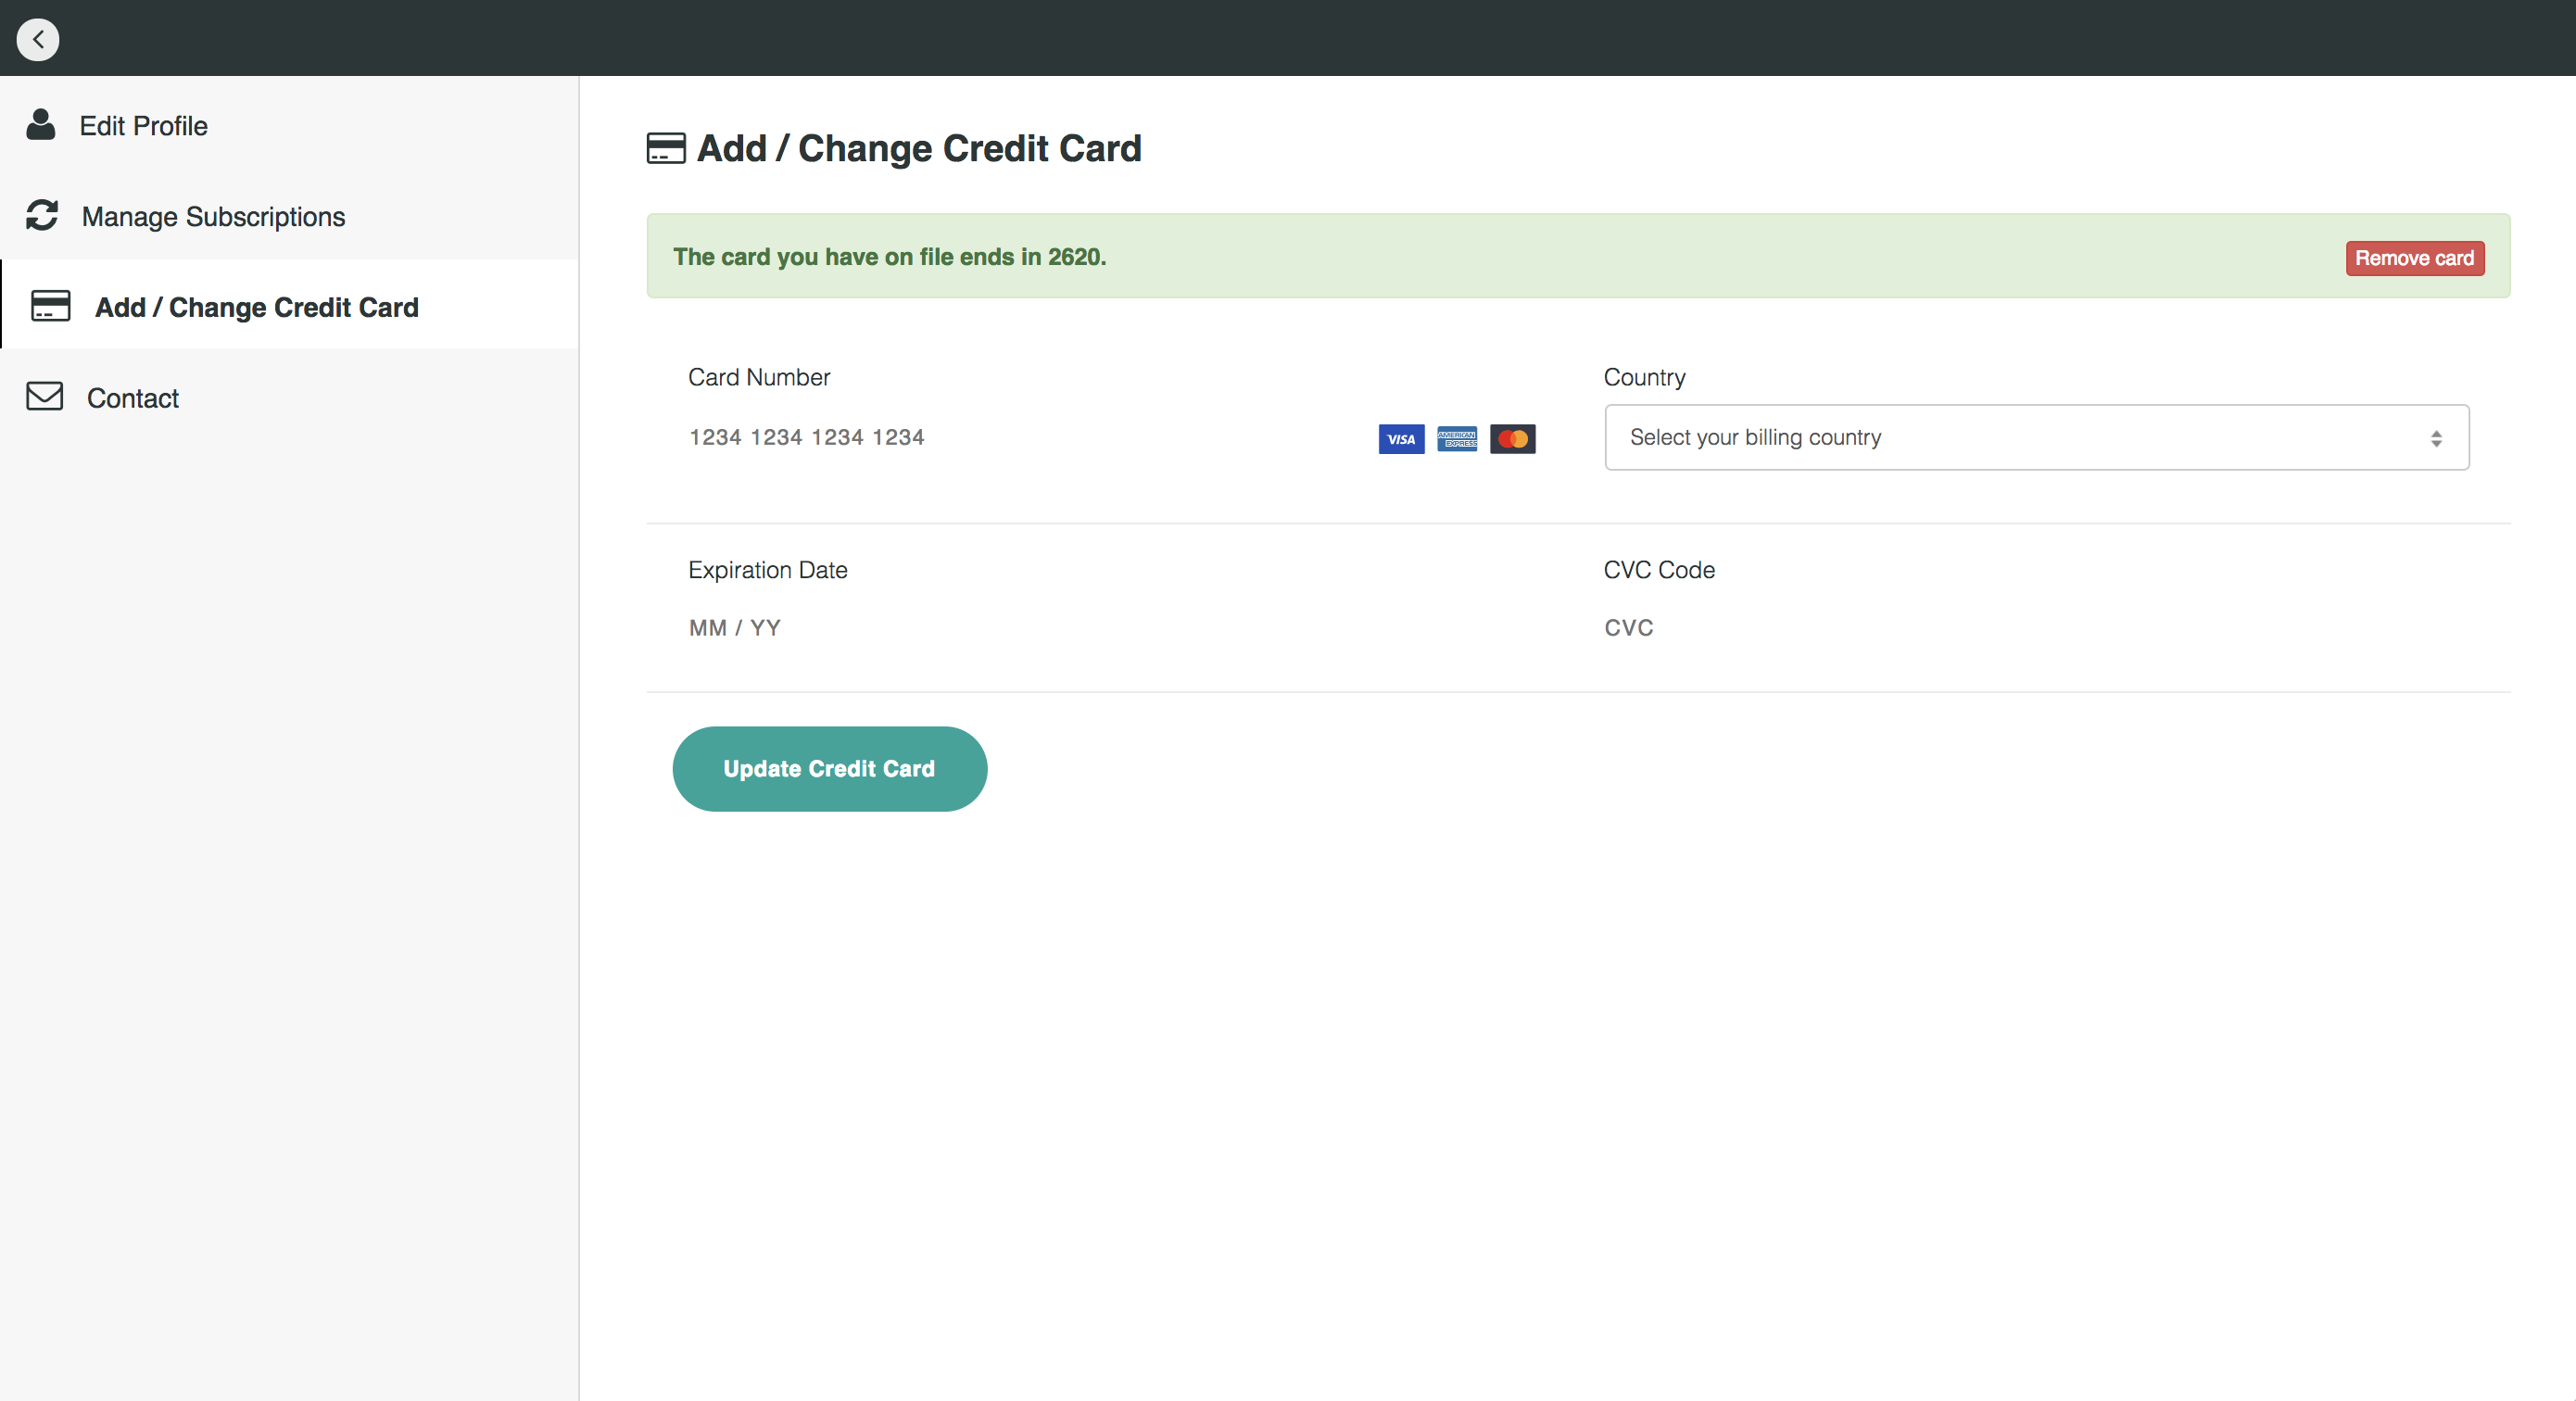
To navigate to your profile, Log in to the School you're enrolled in. Then, click your icon located in the top-right corner of any page. From there, you can select which page of your profile settings you would like to go to (Edit Profile, Manage Subscriptions, Add/Change Credit Card or Contact).
The Add/Change Credit Card page allows you to see which card is currently associated with your school account.
To remove a card, click the Remove Card button.
To add a new card (if there is no associated card) or update an existing card, enter in your credit/debit card information and then click Update Credit Card.
4.1. Add or edit address information
For all users, there will be an Address section in your profile menu.
To add or edit an address, fill out all applicable fields. Required fields will be denoted with an asterisk (*). Click the Update Billing Info button to save your information.
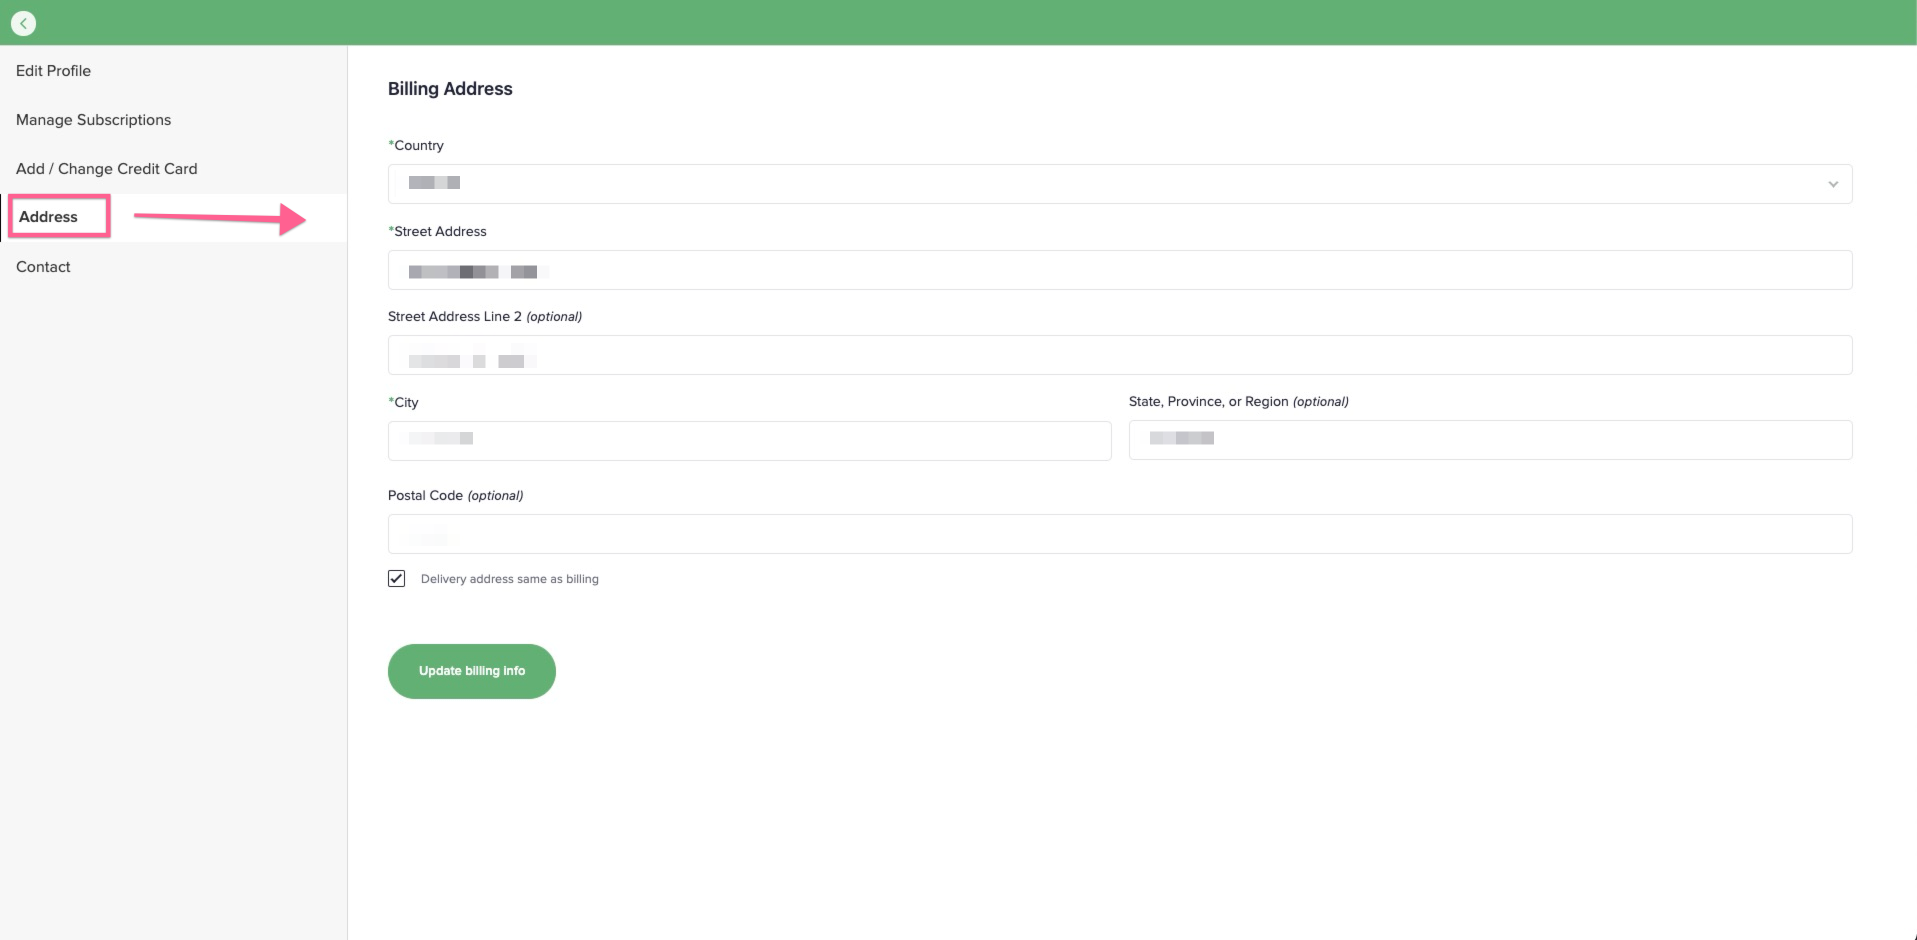
Note: The address added on this page does not change the original billing address added on the product Checkout Page. However, you can edit the address here for any updates to be applied to future payments.
5. Cancel or manage subscriptions
The Manage Subscriptions page will list the number of active subscriptions you have in that school (e.g. pricing plans and monthly subscriptions).
If you have an active subscription, you'll see the Course Name, the Recurring Price, the Time of Enrollment, and a Cancel button (which will cancel your subscription at the end of the current billing cycle).
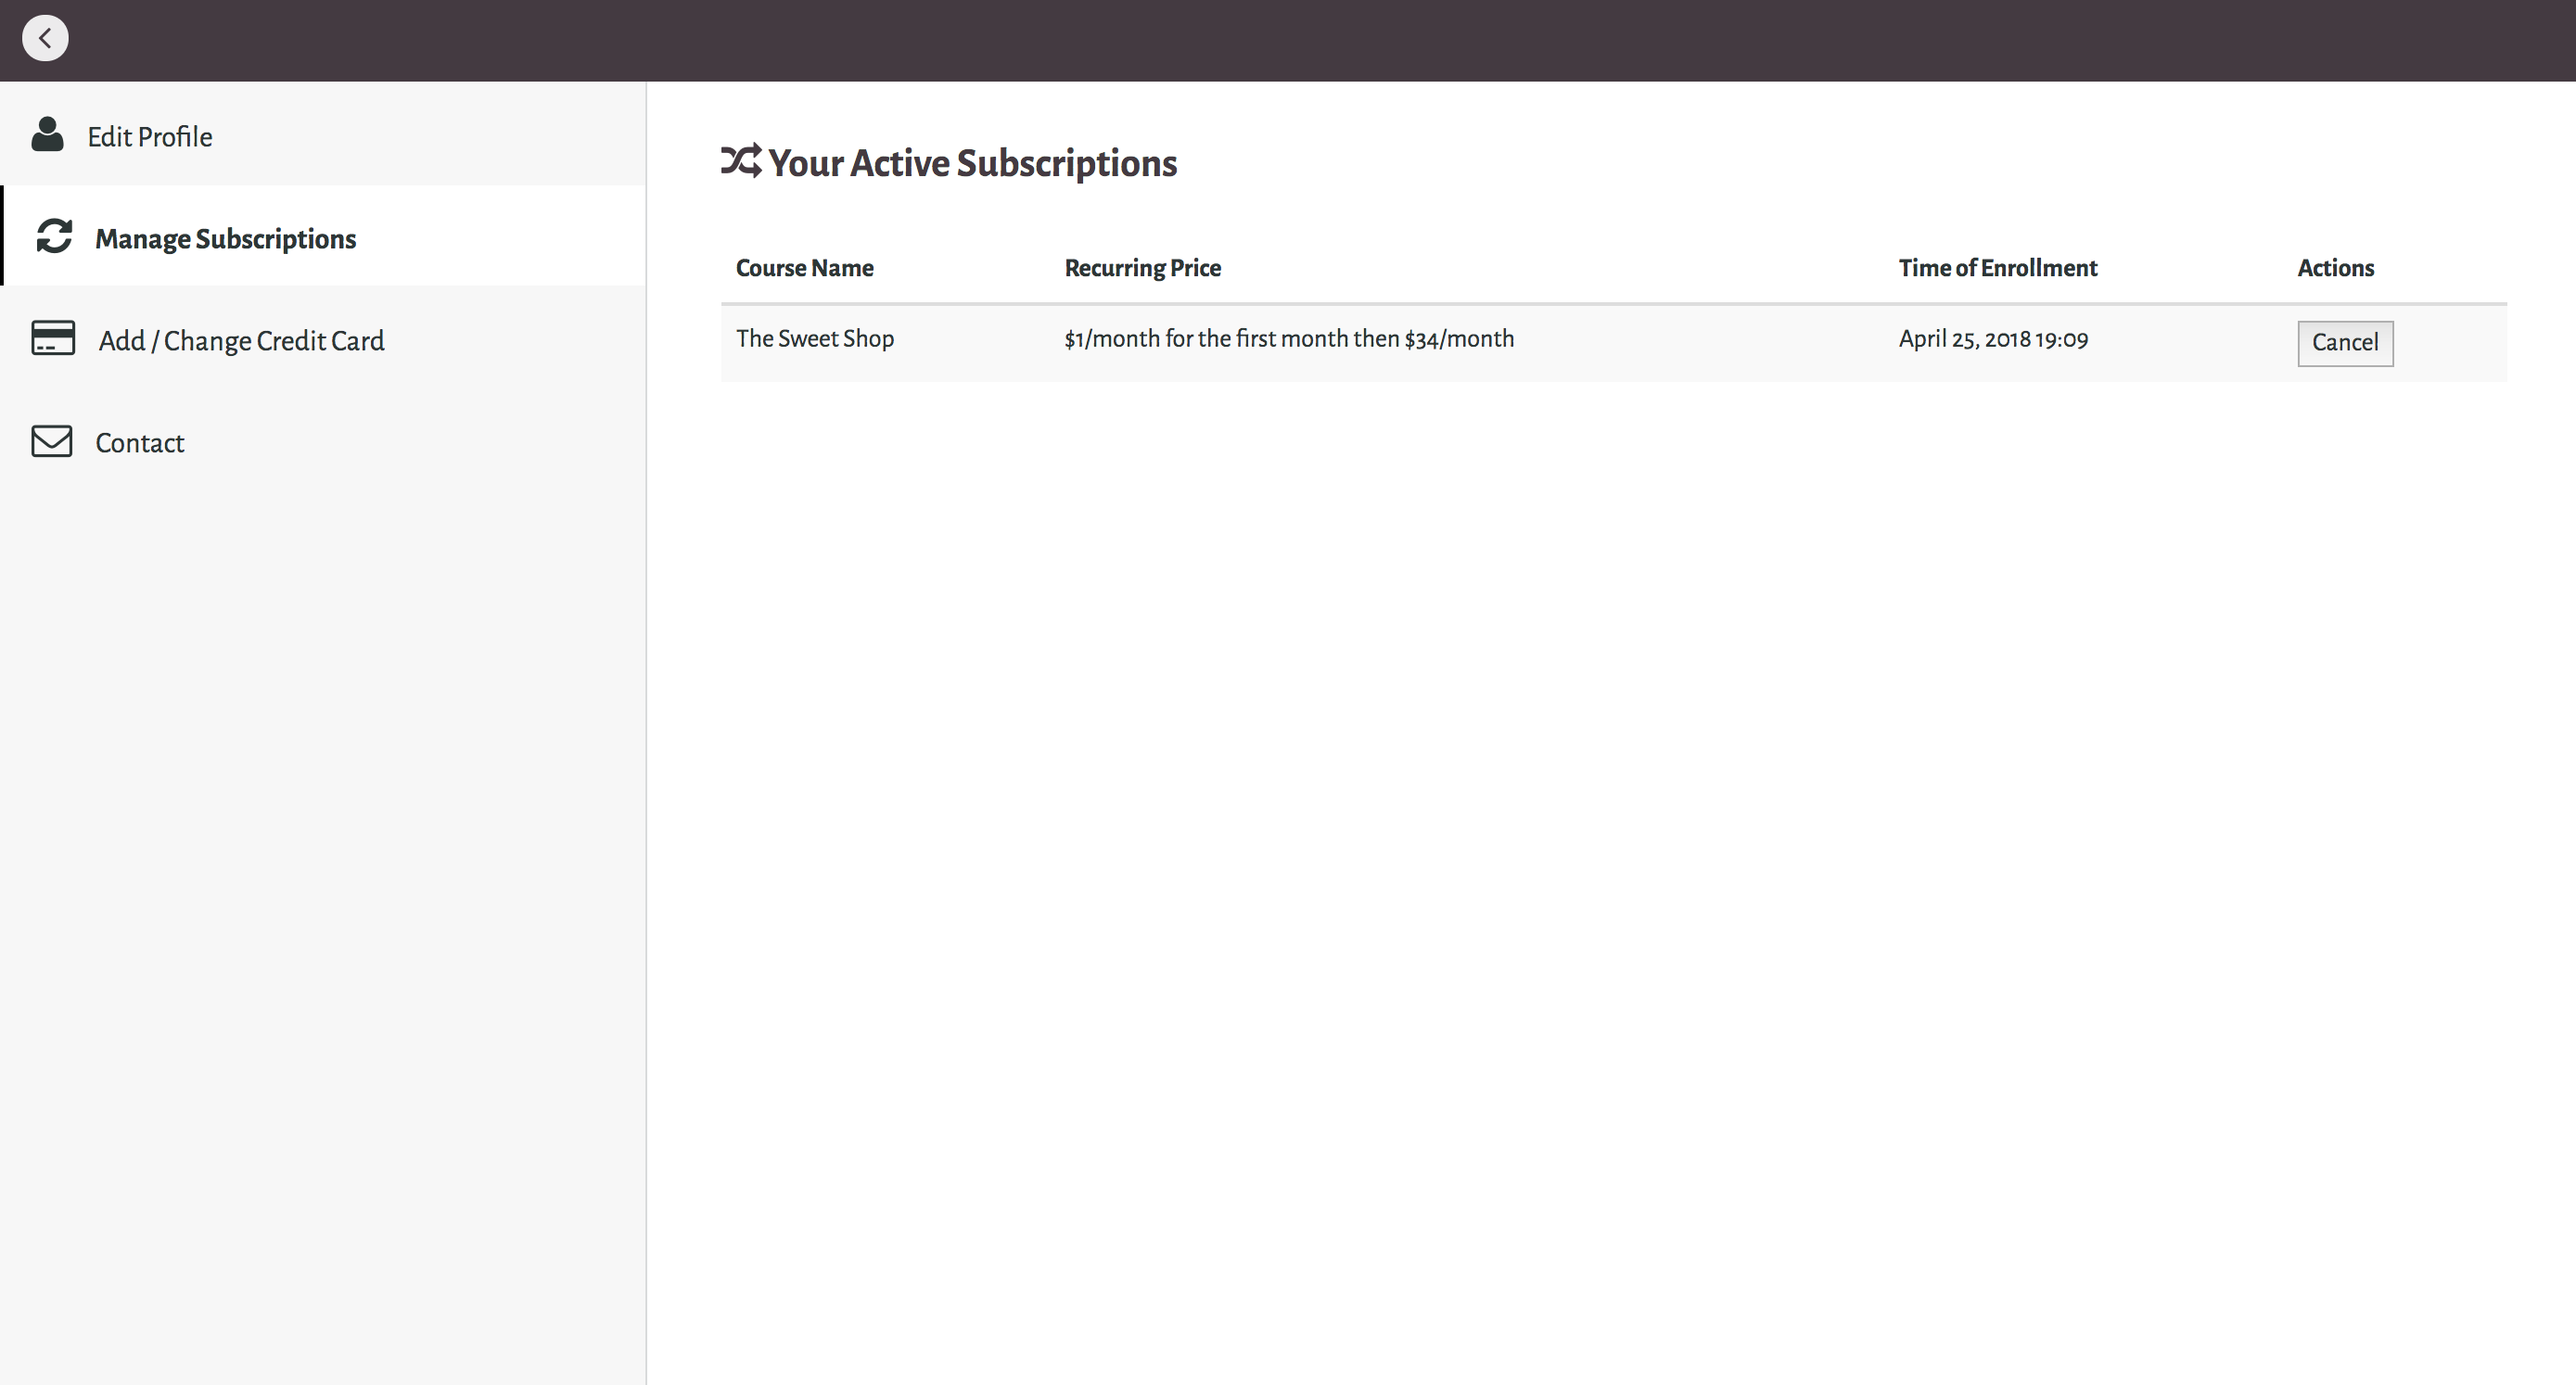
Note: If you are enrolled in a fixed payment plan schedule, rather than a recurring weekly/monthly/annual subscription, you might not have the option to cancel. Please contact Triangle courses through this link with any questions about your payments.
6. Understanding the Course Curriculum View
This article goes over how to view, navigate, and interact with course content as a student who has enrolled in a course hosted by Triangle kinesiology courses.
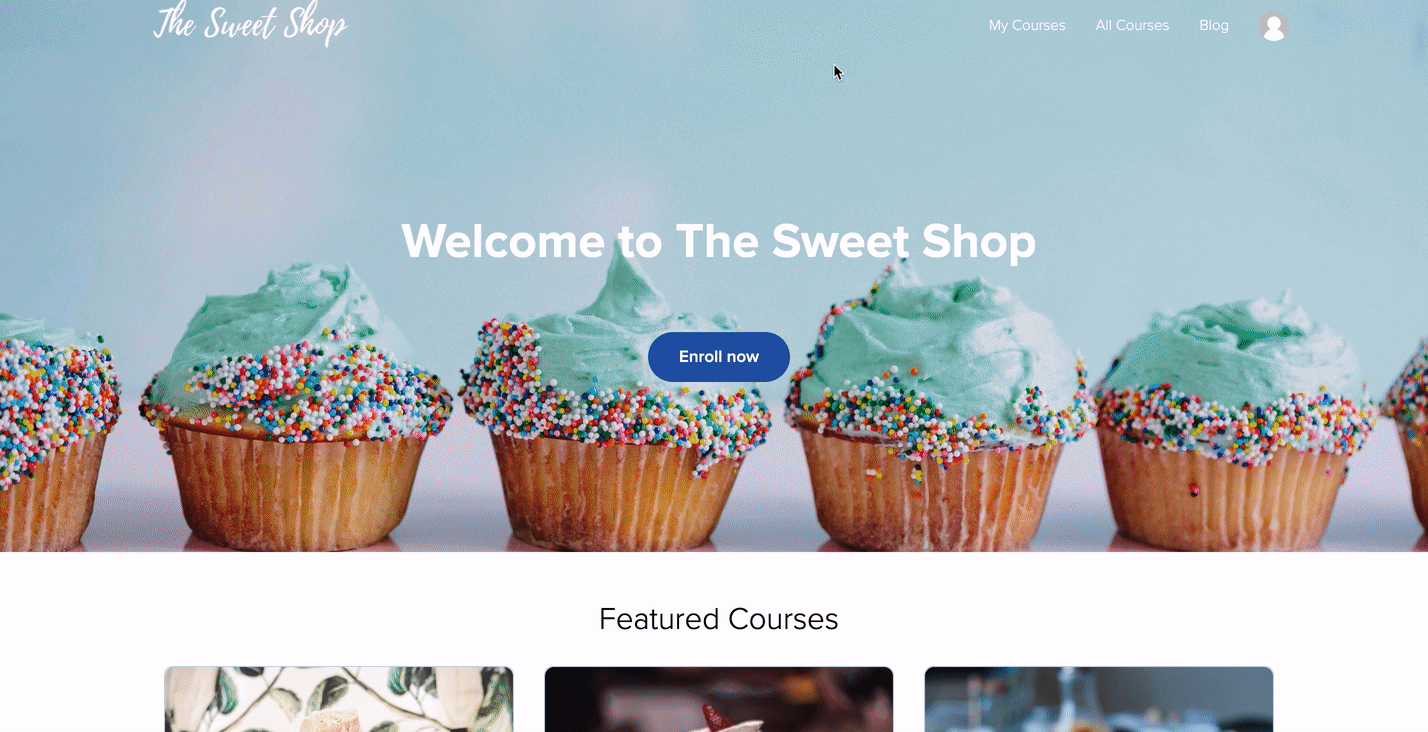
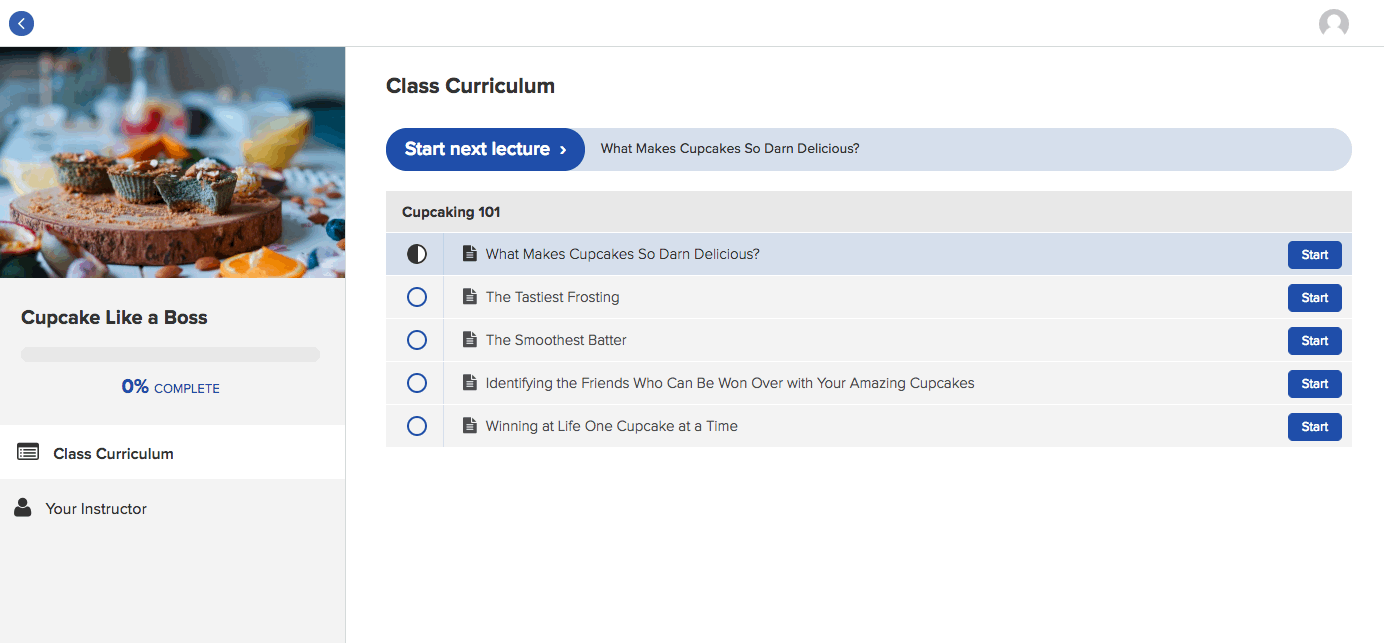
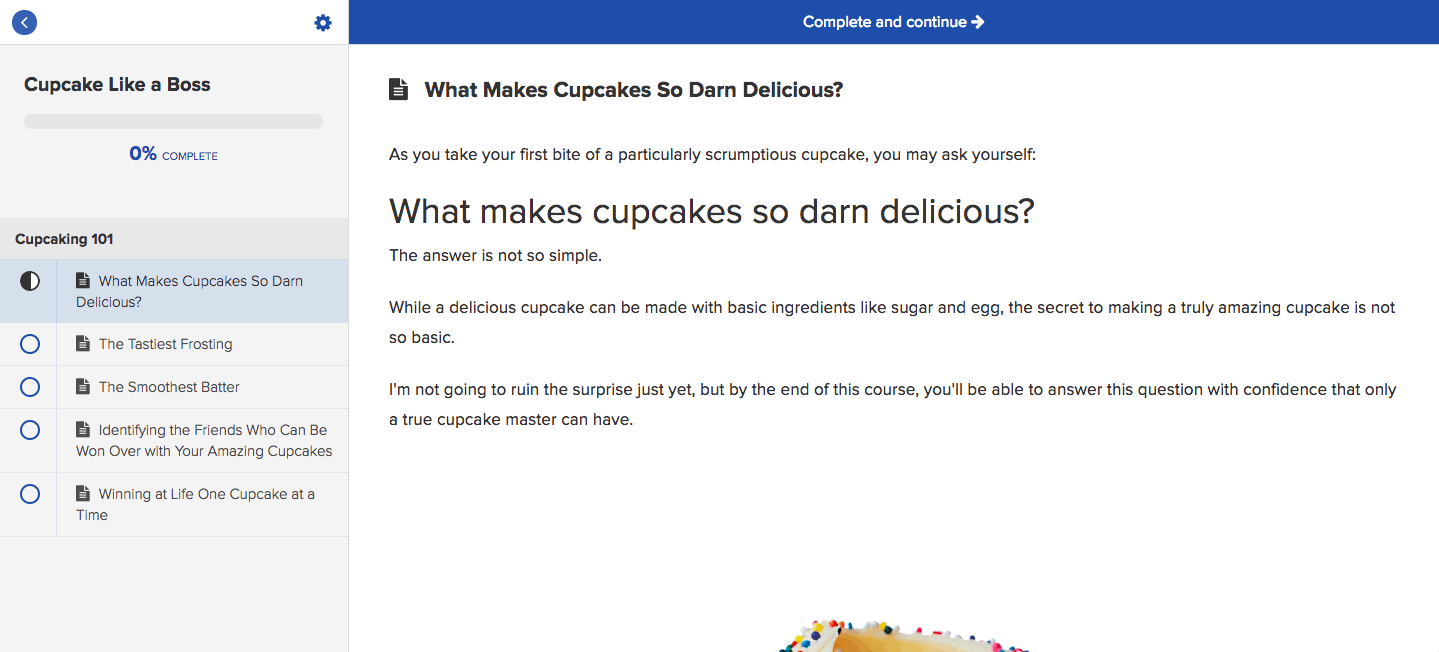
Once you’ve logged in to a school, click My Courses and then click a course to be taken to its course curriculum:
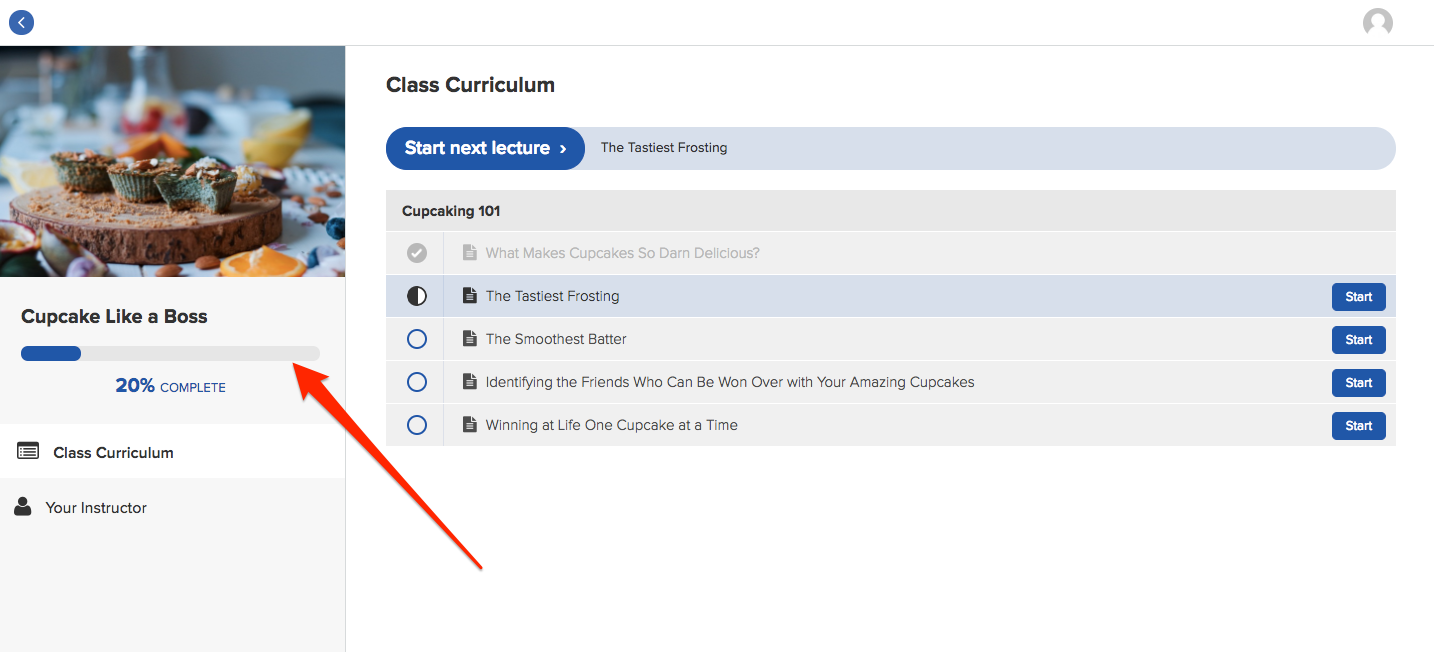
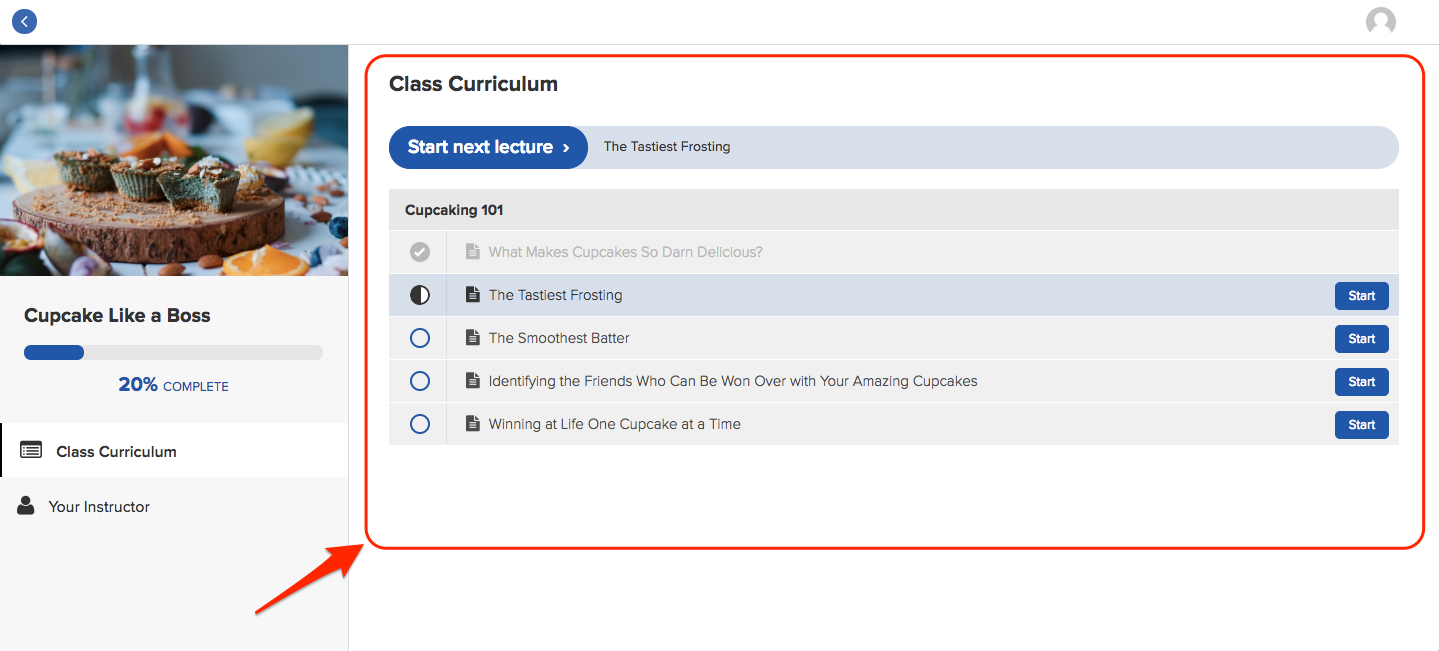
In the course sidebar, you can view the following information:
- Course Progress - This progress bar displays the percentage of the course that you have completed.
- Class Curriculum - This displays all of the sections and lectures in the course.
- Your Instructor - This provides descriptions/bios of the individual(s) teaching the course.

6.1. Navigating Through Lectures
There are several ways you can navigate through a course. One way to start viewing a lecture is to click on the Start next lecture button at the top of the course curriculum. This will take you to the next uncompleted lecture in the course.
Alternatively, you can click the Start button next to each individual lecture to view them.
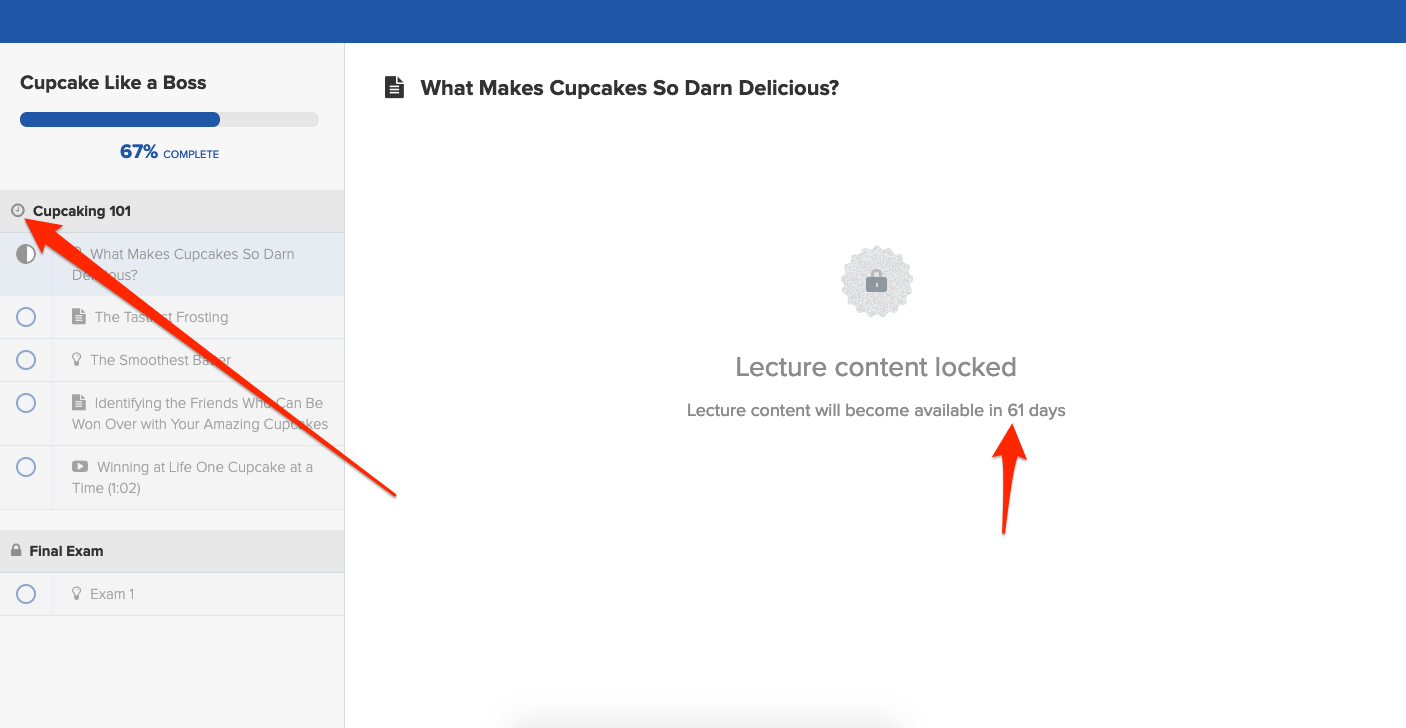
If a section of your course is marked with a clock icon, then the section has not been released yet; in other words, the school owner is “dripping” out this section over time. You’ll need to wait until the section is released by the school owner before you’ll be able to view it. Once this time has elapsed, you’ll receive an email notification from the school and you’ll be able to access the lectures in the section.
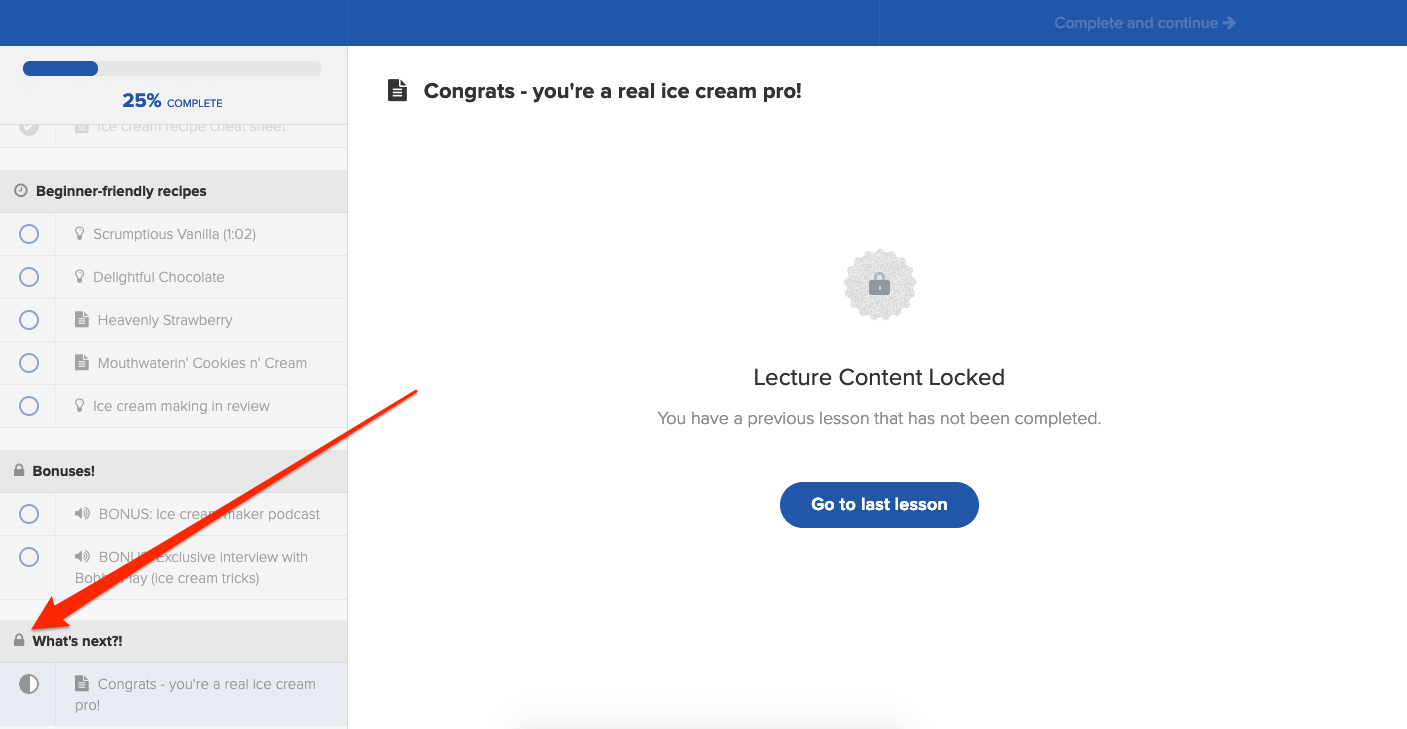
If a section of your course is marked with a lock icon, then you must complete all lecture content (e.g. a video or quiz) in sequential order, before progressing to these lectures.
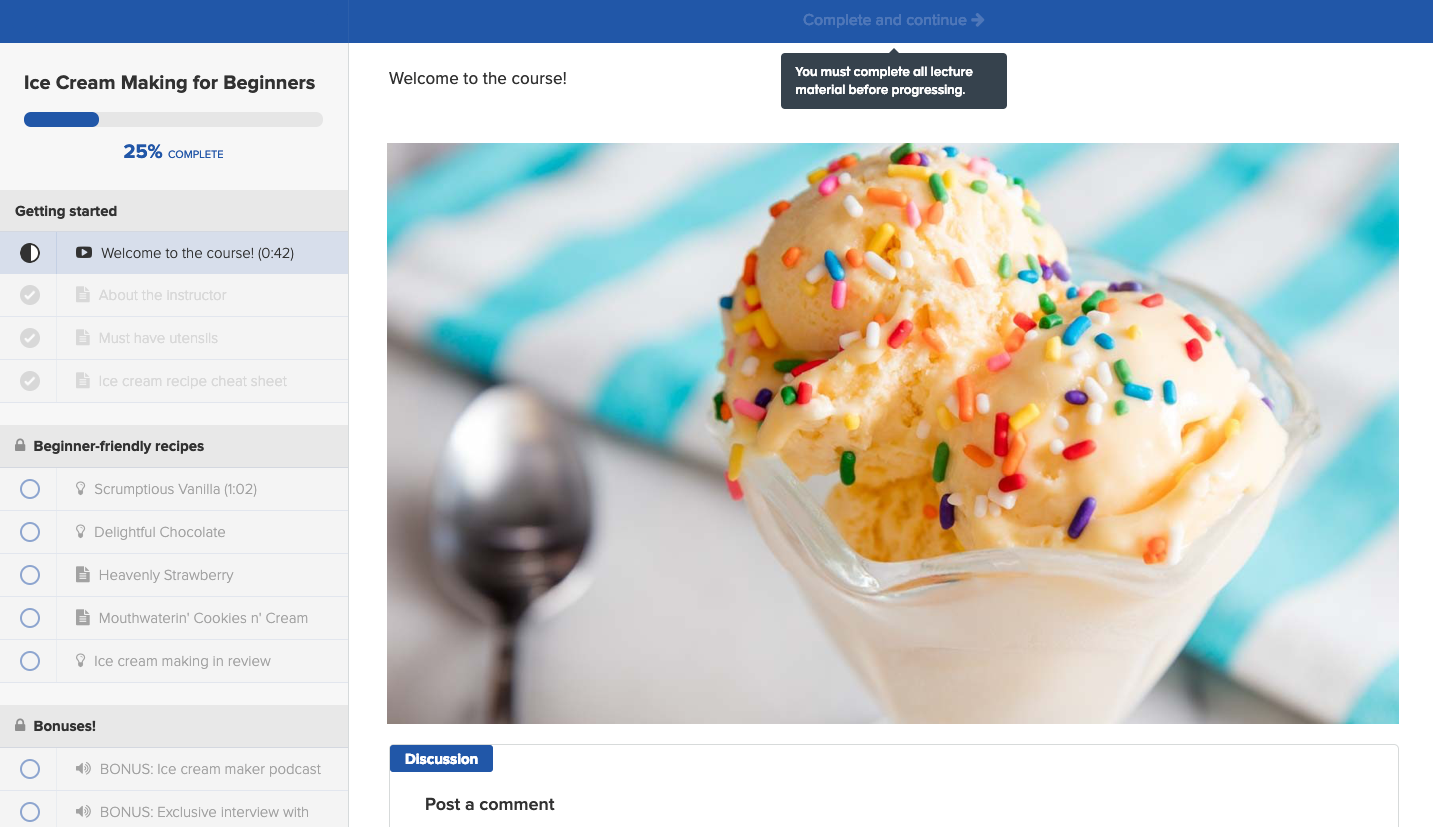
If you do not complete a lecture video, then you’ll be unable to progress to the next lecture until you watch the entirety of the video:
If you do not achieve a passing grade on a quiz within a set number of retakes, then you will not be able to progress to the next lecture. Your school owner will receive an email notification indicating that you are not able to progress through the course and will have the option to reset your quiz score. If the school owner resets your quiz score, then you will receive an email notification indicating that you can retake the quiz.
6.2. Marking Your Course Progress
As you progress through lectures, click on the Complete and Continue button to mark the lecture as complete and move on to the next lecture in the course:
Afterwards, you’ll see a checkmark next to the completed lecture and your course progress percentage will increase. Incomplete lectures are denoted with an empty or a partially filled-in circle. Completed lectures are denoted with a checkmark. You can view individual lecture progress and course progress in the course sidebar here:
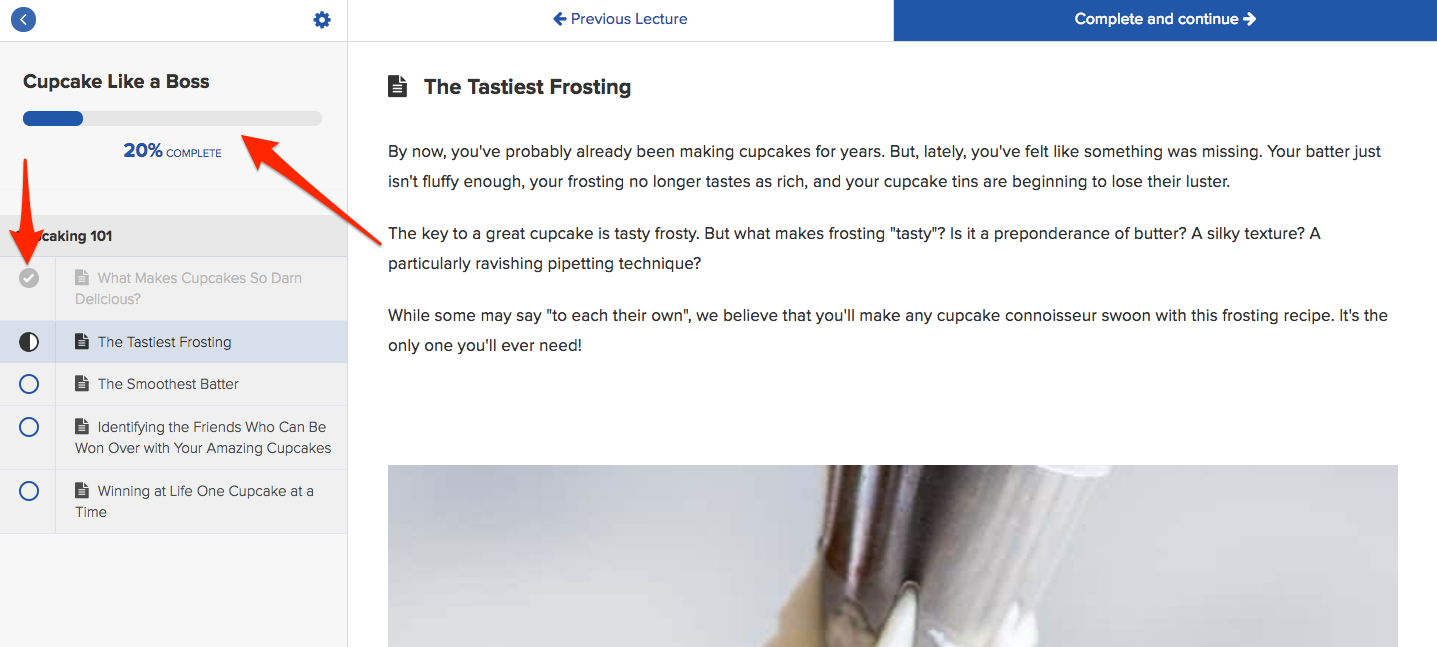
It’s important to note a few things as you mark your progress through a course:
- Lectures will only be marked as complete if the Complete and continue button is clicked. If you navigate through the course by selecting individual lectures in the course sidebar, then the lectures will not be marked as complete.
- You can still access lectures even if they are marked as complete. To do, click on the individual lecture in the course sidebar.
- If you want to reset your course progress, you can contact Triangle courses through this link and request that they reset your lecture progress. If the school does not have access to this feature, they can delete your existing account and then manually add/enroll you back in the course. This effectively “resets” your course progress.
6.3. Adjusting Lecture Video Settings
You can adjust the settings for lecture videos in your course by clicking on the gear icon:
- Autoplay - When toggled, the first video lectures will automatically begin playing when you enter the lecture.
- Autocomplete - When toggled, lectures will automatically be marked as complete when you finish the last video in the lecture.
- Player - This allows you to select the type video player (HTML 5 or Flash) that you want to use while viewing lecture videos.
- Speed- This allows you to select the speed at which you want the lecture videos to play.
6.4. Downloading Lecture Content
If content is downloadable, it will be denoted with a paper clip symbol. Click on the download link to download the content:
Depending on your browser settings, the file will either download directly to your computer, or a new browser tab will open, where you can download the file to your computer.
Course files cannot be printed directly within Triangle school. If you would like to print any course files, you will first need to download the file on your computer. Then, you can open the file directly on your computer using a third-party application (such as Adobe Acrobat Reader, Google Drive, or other word processing apps) and print the file from there.
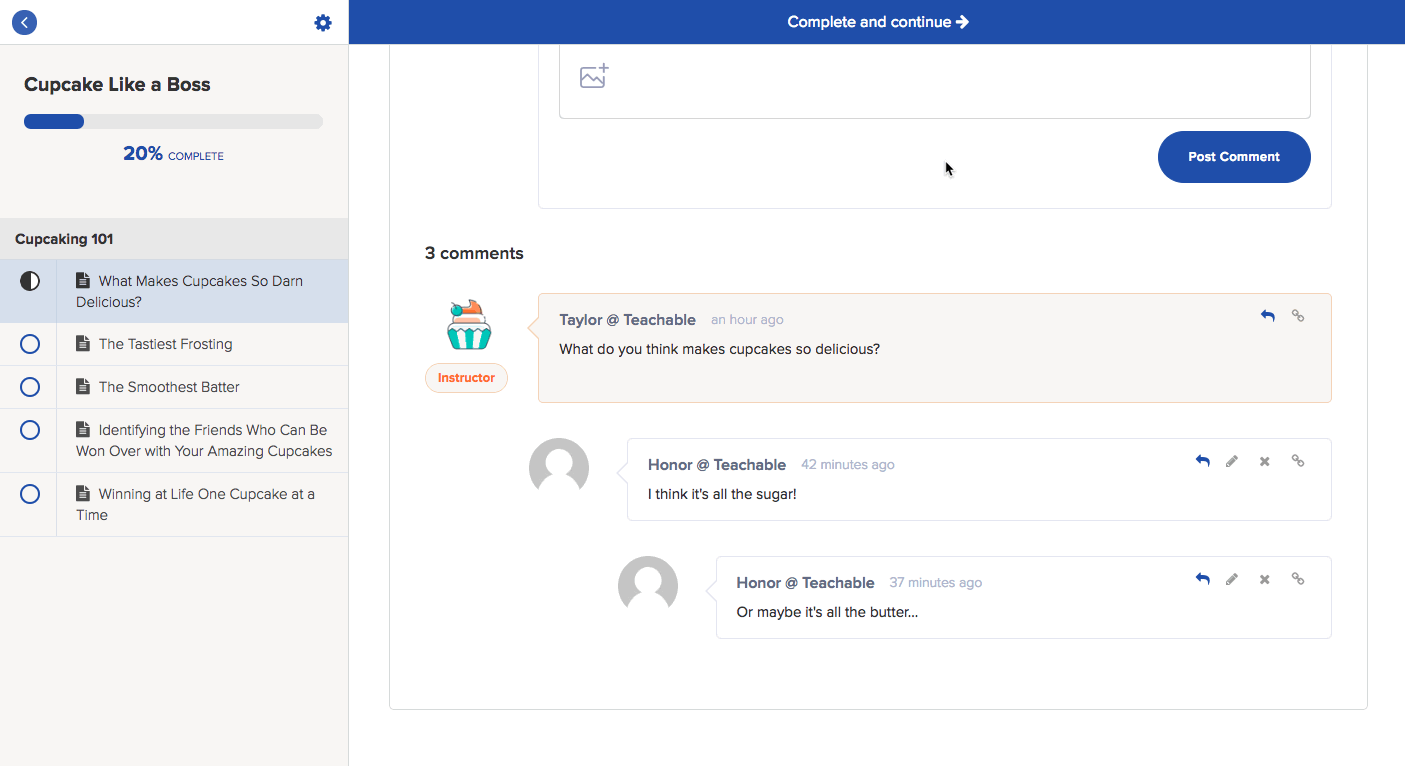
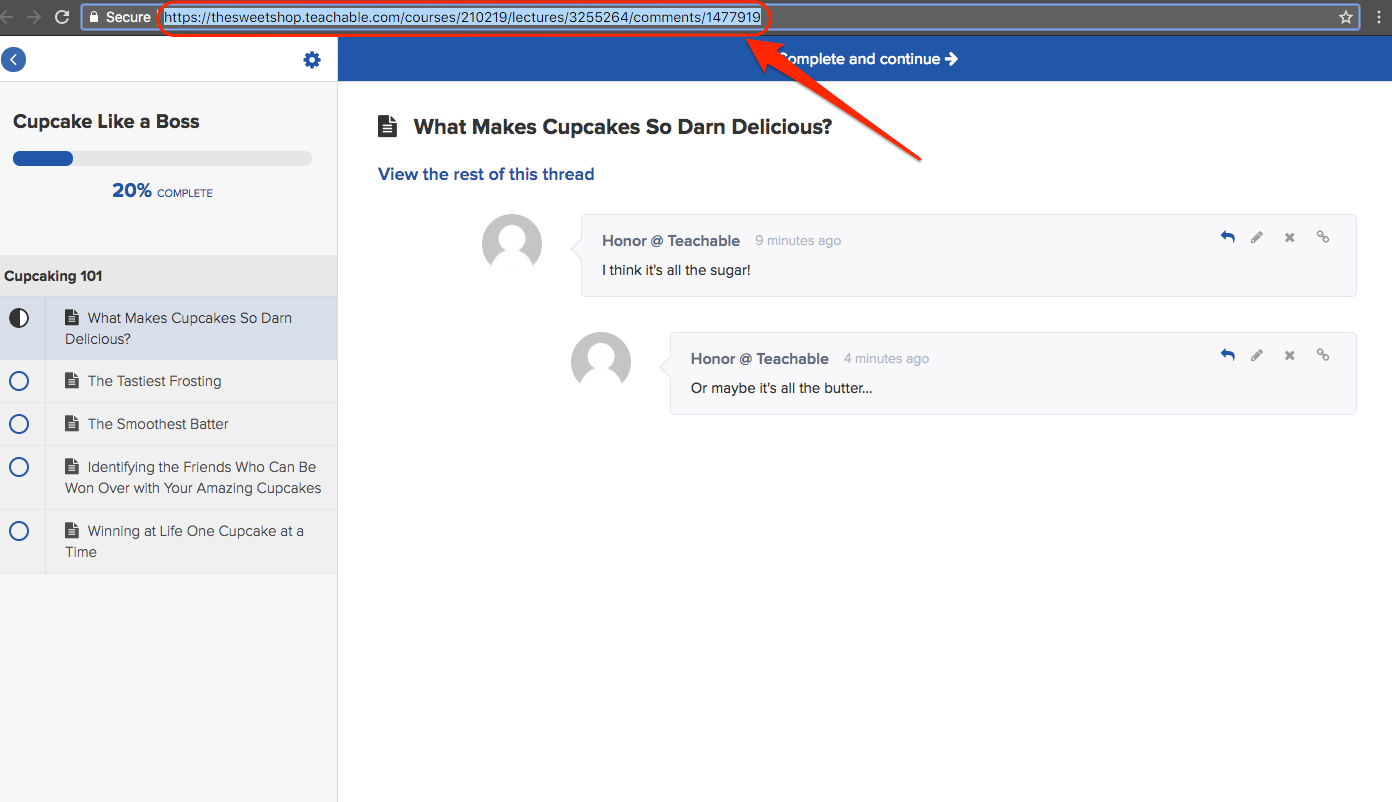
6.5. Commenting On a Lecture
If the School has set up comments, then you’ll be able to comment on individual lectures.
To add a comment, scroll down to the bottom of the lecture to the Post a Comments section and click on the arrow icon to reply.
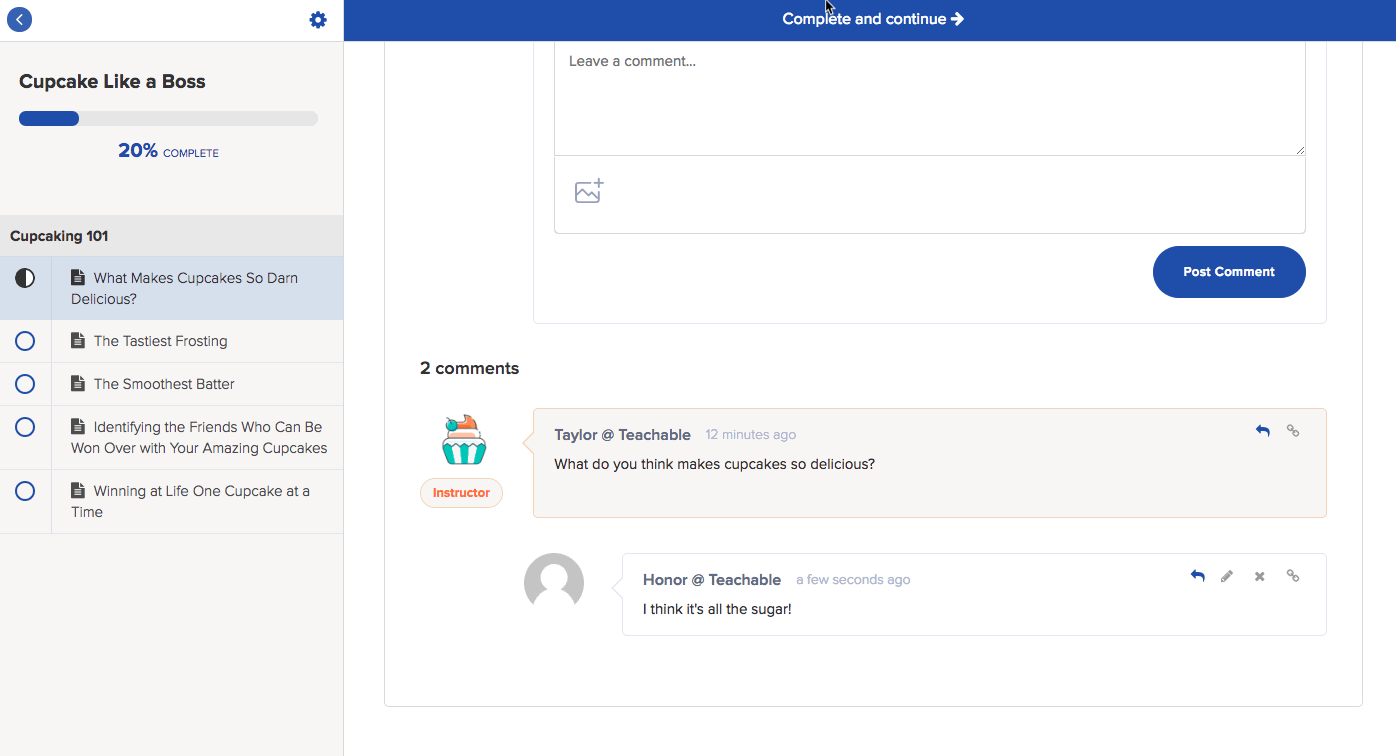
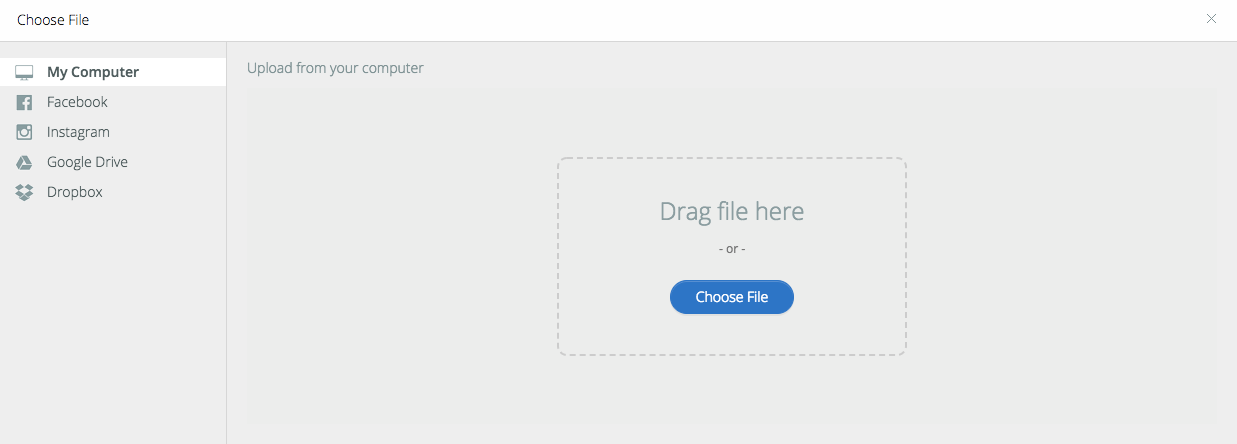
Add text into the Leave a Comment field and/or upload an image using the image uploader here:

An image uploader will appear, where you can select a file to upload to your comment.
Once you’ve finished adding text and images, click on the Post Comment to make your comment visible in the comments thread.
You can also go back and edit, delete or copy a direct link to your comment navigating back to the comments thread. Once you’ve found your comment, you’ll see these icons:
![]()
To edit a comment, click on the pencil icon. The text editor will appear once more and you’ll be able to enter new text or modify existing text. Click the Save Comment button when you’re finished editing.
To delete a comment, click on the “X” symbol. This will immediately delete your comment from the comments thread.
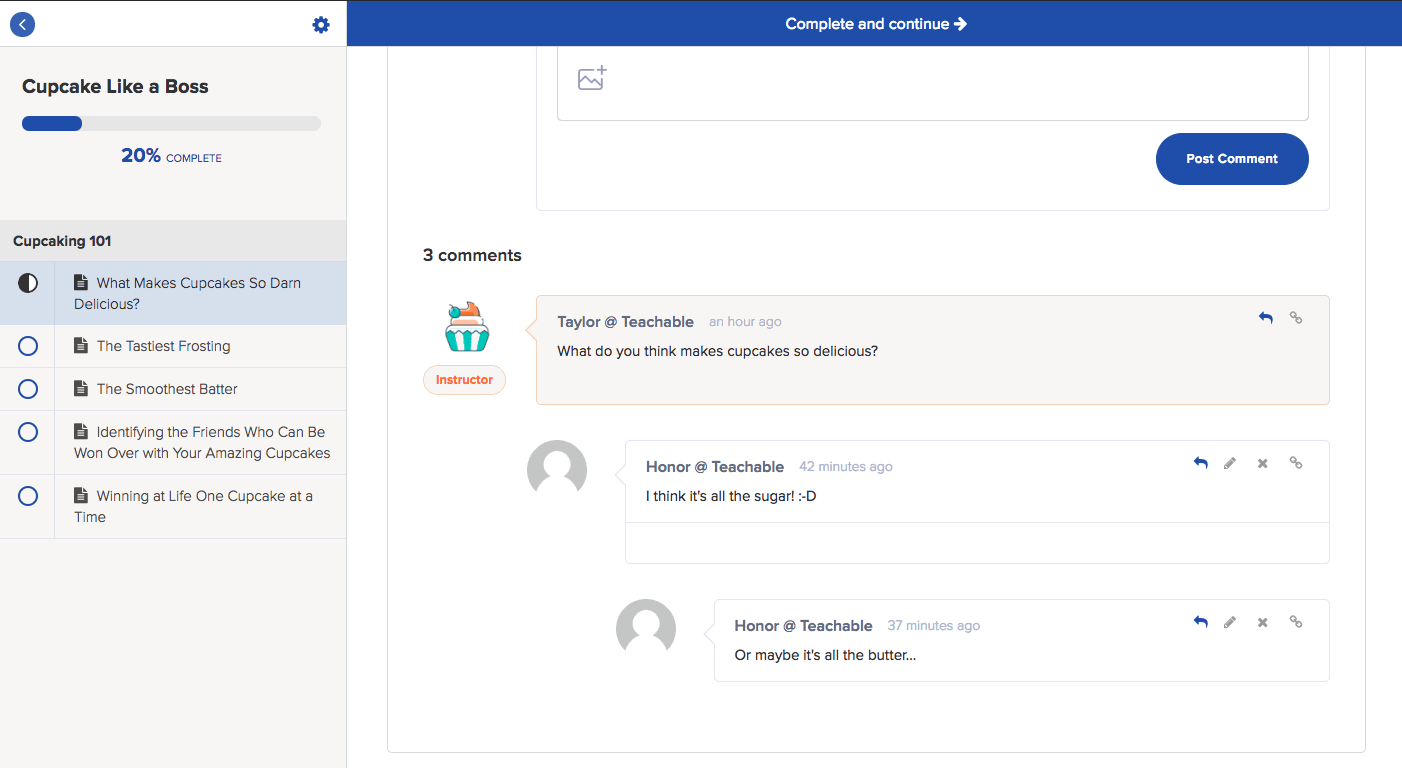
To copy a direct link to the comment, click on the link icon. A new window will open, where you can copy the URL in the address bar.
7. Reset Your Password
You may be experiencing login issues due to an outdated or invalid password, in which case you may wish to reset your password entirely. To reset your password, complete the following steps:
- In the login screen, click Forgot Password?
- Enter your email address into the Email Address field and then click Send Me Instructions.
- Adblock
- Security extensions (like HTTPS Everywhere)
- Grammarly
- Dingo


If you have an account in Triangle kinesiology courses, then you’ll receive a notification indicating that reset instructions have been sent to the email address you specified:

Be sure to check your spam or promotions folders if you do not see the reset password email in your inbox. When you receive the email, you will need to change your password within 24 hours. If it has been over 24 hours since you requested the email, you should request a new reset password email.

If you do not have an account in the school associated with that email address, then you’ll receive an error message that indicates that your email address is not associated with an account in the school.

If you do not have an account in this school, this indicates that you used another email address to register for the school. If you believe this to be an error, please contact the school owner directly.
Note: Not immediately logged in with your new password? Turn off password manager extensions and ensure that your browser isn't accessing an existing login cookie by opening the reset link in a private browsing (or "incognito") window.
7.1. Try an Alternative Browser or Device
We recommend using the most up-to-date versions of Google Chrome or Mozilla Firefox to log in and access your course. If you are using an alternative browser, try logging in to your course using one of these recommended browsers.
If you are still unable to log in, try using a different device. For example, if you are using a mobile device (e.g. iPhone, iPad, tablet, etc.), try switching to a desktop computer or laptop.
7.2. Clear Your Cache
Many login issues are browser-related, which is why we recommend that you clear your browser’s cache if you experience issues logging in to your course. When you browse websites online, web browsers store, or “cache,” website data (like images and scripts) as a way to improve your experience. Clearing your web browser’s cache removes these stored assets, and this may help resolve issues with logging in to your course.
To clear your cache in Google Chrome, click the menu and select More tools. Then click Clear browsing data. Make sure that the Cached image and files box is checked.
To clear your cache in Mozilla Firefox, go to your Preferences and then find the Advanced panel. From there, click Clear Now in the Cached Web Content section.
7.3. Uninstall or Disable Third-Party Browser Extensions
Another browser-related issue is the interference of third-party extensions. While third-party browsers can be extremely useful, some have been known to cause problems for students attempting to log in to their courses. For example, one common type of extension that may cause login issues are password managers.
Below are a few popular extensions that have caused issues in the past for some School's users:
You can research online to see if there are any known conflicts/issues with extensions that you have installed in your web browser. If you have a lot of extensions, this can save you some time.
You can verify whether or not a third-party browser extension is causing the login issue, by opening another browser, ideally without any third-party extensions installed. Then attempt to login; if the issue still occurs, an extension is probably not the cause. However, if the issue does not occur, an installed extension in your other browser may be to the cause of your login issues.
Once you know that an extension may be responsible for the problems, test each extension by disabling it and reloading the page. If disabling the extension stops the issue, you can pinpoint the extension as the culprit and either remove it or keep it disabled while using Triangle school. Disabling an extension will turn it off without removing it while deleting an extension will remove it entirely.
For further information about how to manage extensions in your browser, see here:
If you're using Firefox, you can also turn off the Enhanced Tracking Protection option, as this can sometimes interfere with a page's functionality. Here's how to do that:
![]()
8. Contacting Triangle kinesiology courses
You can use Triangle's contact form for students. To access the contact form:
To access the contact form:
- Log in to your account.
- On the top-right side of your navigation bar, click your avatar. This will open a dropdown menu.
- Click Contact.
- On the Contact page, fill in the Subject and Message fields—similar to how you would fill out any other email.
- Once you've finished your message, click Send. This will send your message as an email to your school owner's email address.

If your school owner replies to your message, it will be sent to your email address; from there, you can continue the conversation as needed.
Also you could Contact us through this link.